How to add Firebase Authentication in React (Email Password and Google)
Last updated on
Authentication is essential to ensure only authenticated is able to access the protected content or service. Firebase makes it really easy to implement authentication in your app.
Firebase is a Backend as a Service provider that provides a range of service including Authentication Firestore database, Realtime database and many other features.
In this tutorial we are going to add Firebase authentication to our react application that would allow users to sign up, log in so that they can access authorized content.
Please note that I have built this tutorial using Vite and TypeScript . If you are a beginner don’t get disheartened by this. Rather than consider it as a opportunity to learn TypeScript.
Typescript is easy to begin with. I will explain clearly when I will give type. I would recommend you to start and learn while building project.
Also I have hosted the project on Netlify. Here is the live url.
This is the github repository. associated with this project. Refer to this if you face any error, also feel free to raise if there is any issue.
Requirements
- Node.js
- Google Account
- Any Text Editor (I am using VS Code)
What to expect??
We will basically be able to
- 1. implement email and password based authentication in react using firebase
- 2. implement google accound authentication in react using firebase
- 3. store current user details in global context using context api of react and get the value in any component
- 4. protected routes
- 5. conditional rendering
With the requirements and expectations specified let’s start builiding the project.
Step 1: Setting up Firebase project
Go to https://console.firebase.google.com/
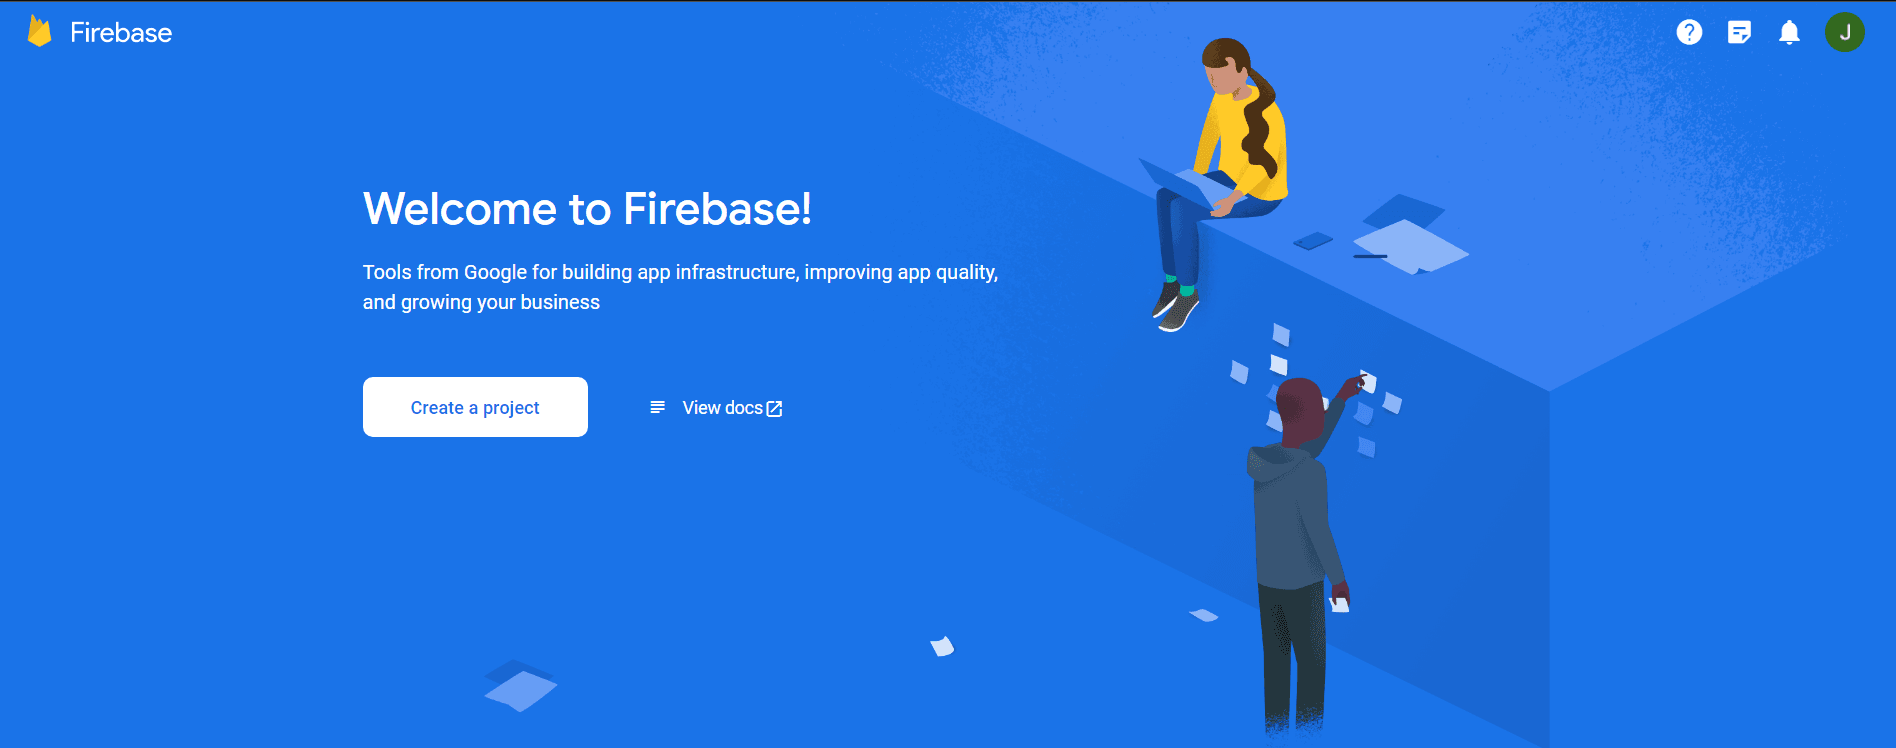
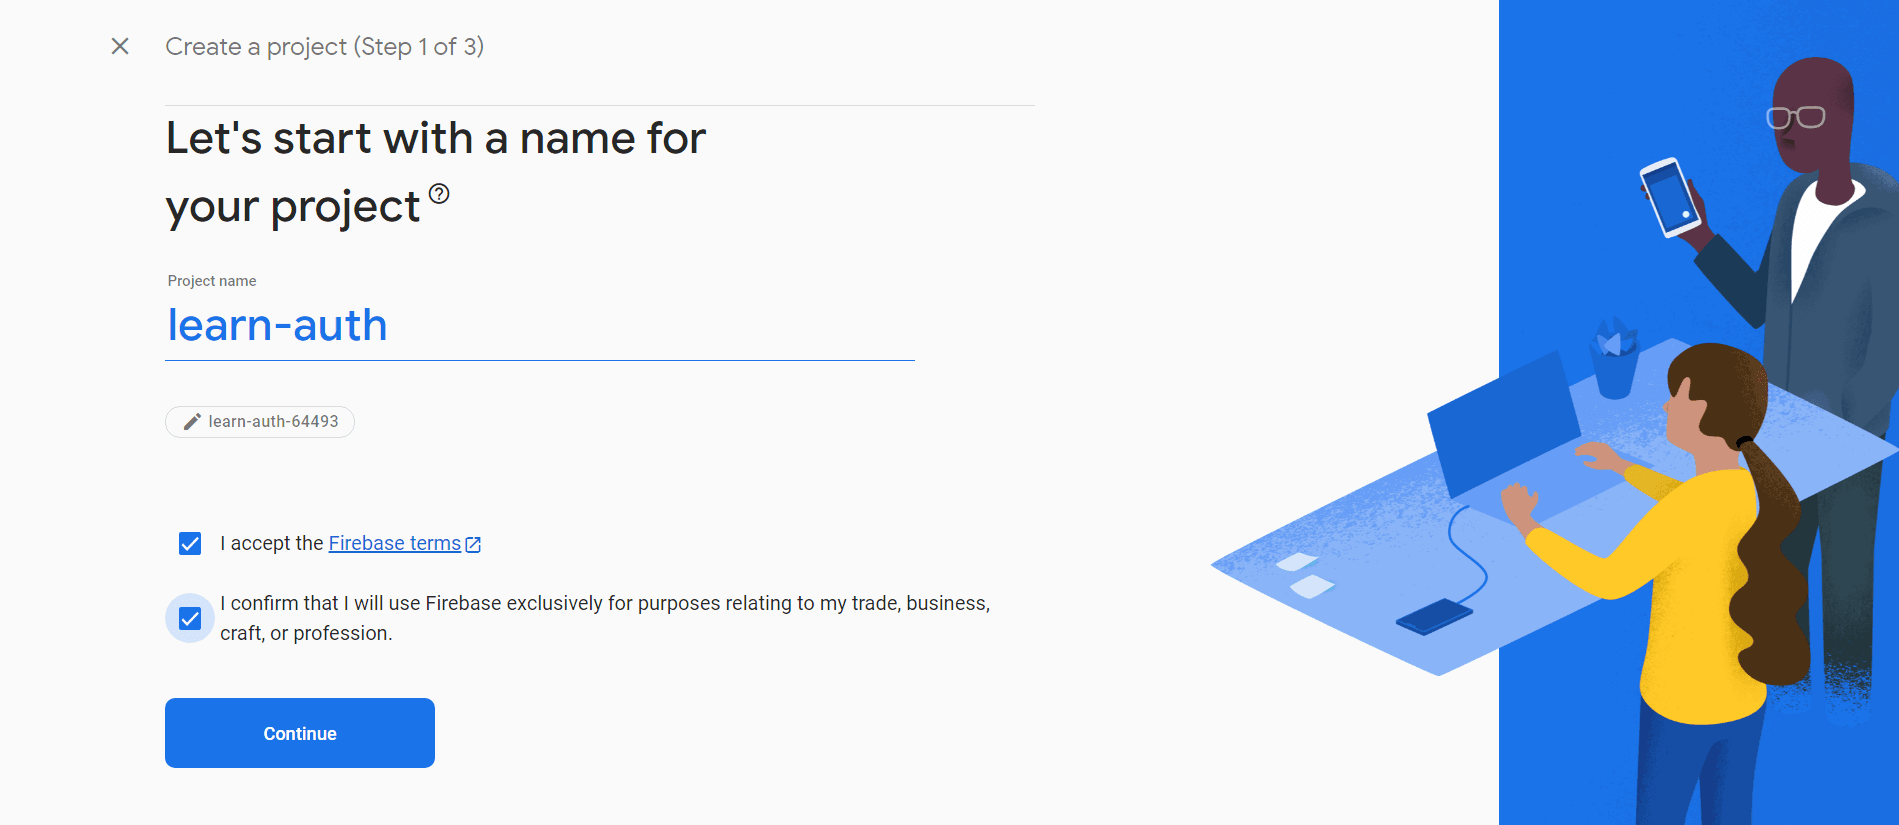
Tap on create a project. Then enter the name of your project. It could be anything. Although make it descriptive enough so that you can differentiate them in the dashboard later when you create multiple project.
In the next step you will be prompted to select Google Analytics. Here I am not enabling analytics. You can if you want to integrate analytics in your account. Click on Create Project. You will be presented with a loading screen. It will take some seconds to minutes to create the project. Once your new project is ready tap on continue.
Then you will be routed to the project page

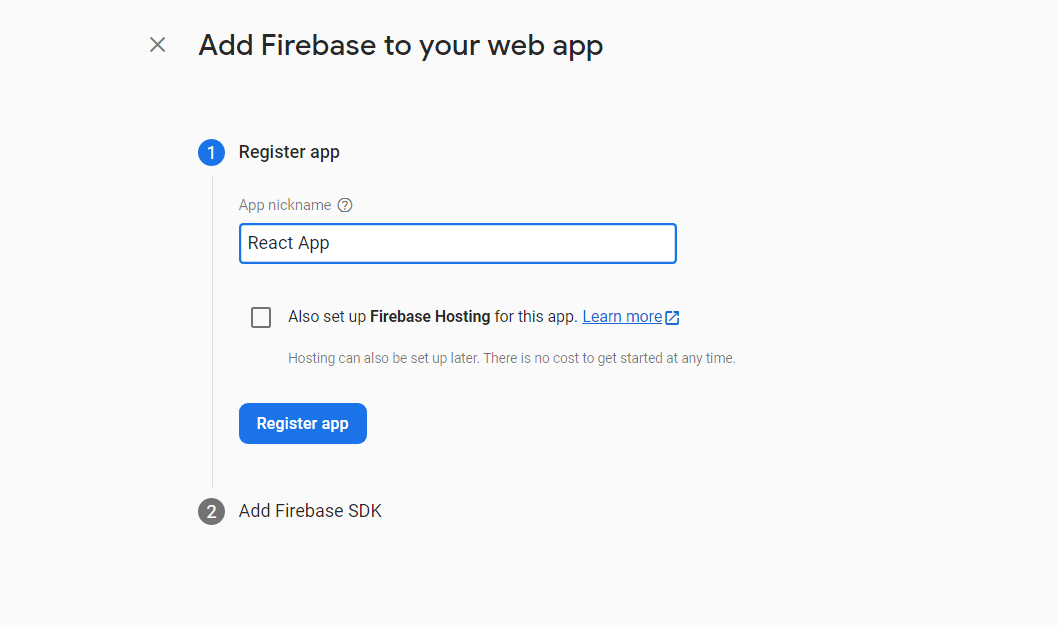
Next step is to add an app. As we are building web project we will select the third option (</>). In this step we will register our app. Add any descriptive app nickname. Here I am not selecting the firebase hosting as I am going to host the project on Netlify.
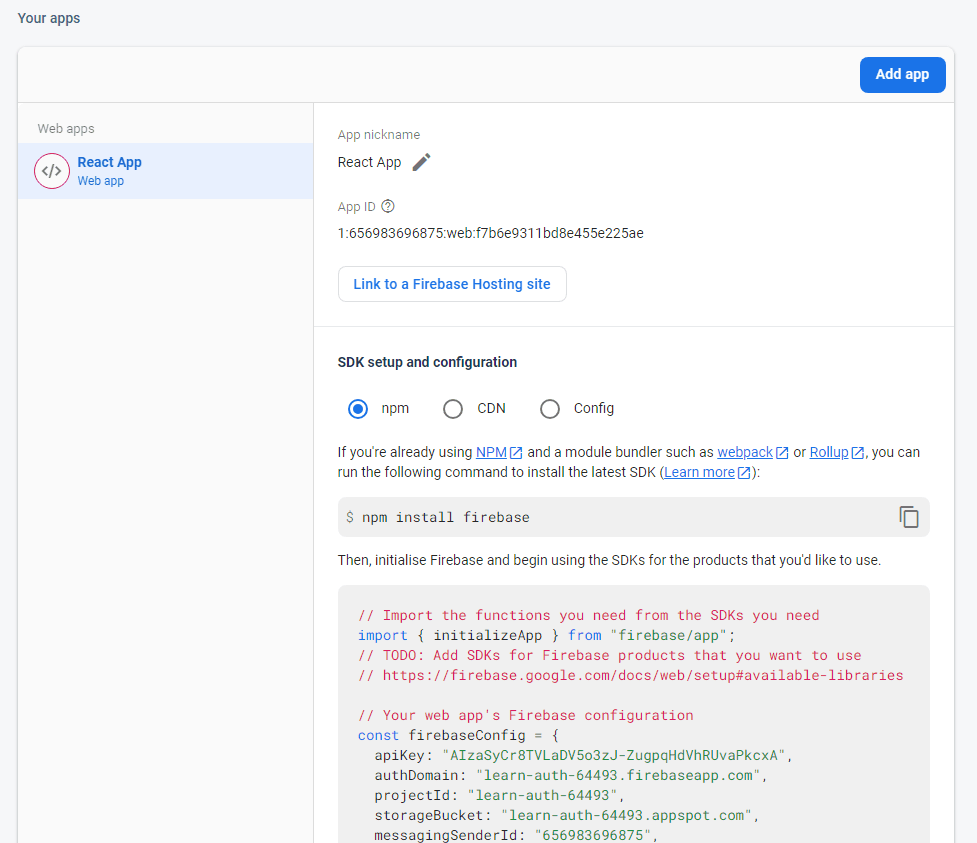
In step 2 you will be provided with the methods to integrate Firebase in your web application. We will be using firebase with the npm. So store the credentials somewhere we will need it later.
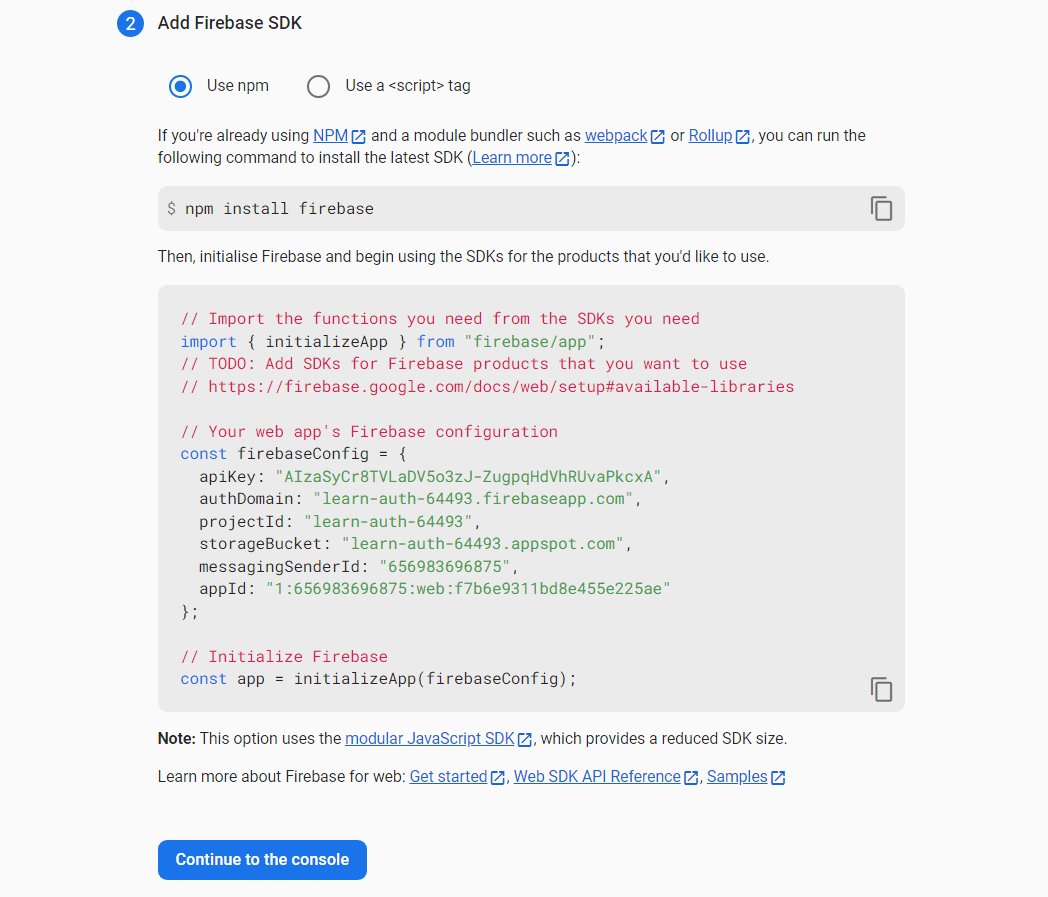
Please keep the credentials secure. Don’t post in online forums or on github. I will tell you how to secure in the next sectons.
Next step is we will turn on the authentication for our website. Tap on continue to console.
You will be again in the overview section. Click authentication card.
If you don’t find the authentication card then go to build in category and there you will find the authentication option.
In the authentication page tap on get started. Now you will be on the sign in providers page.
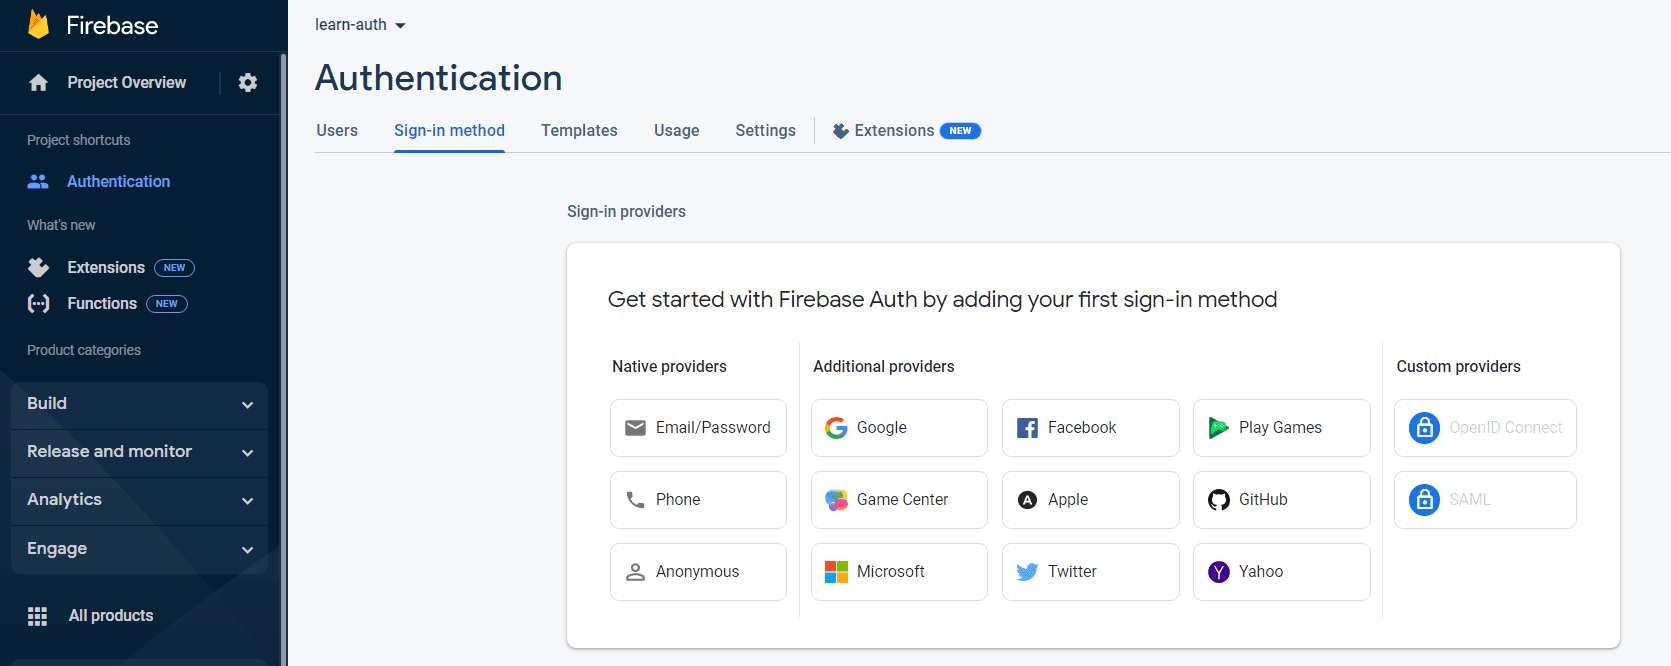
In this option we will turn on the email/password option and google option.
Tap on email/password and enable the option and finally save it.
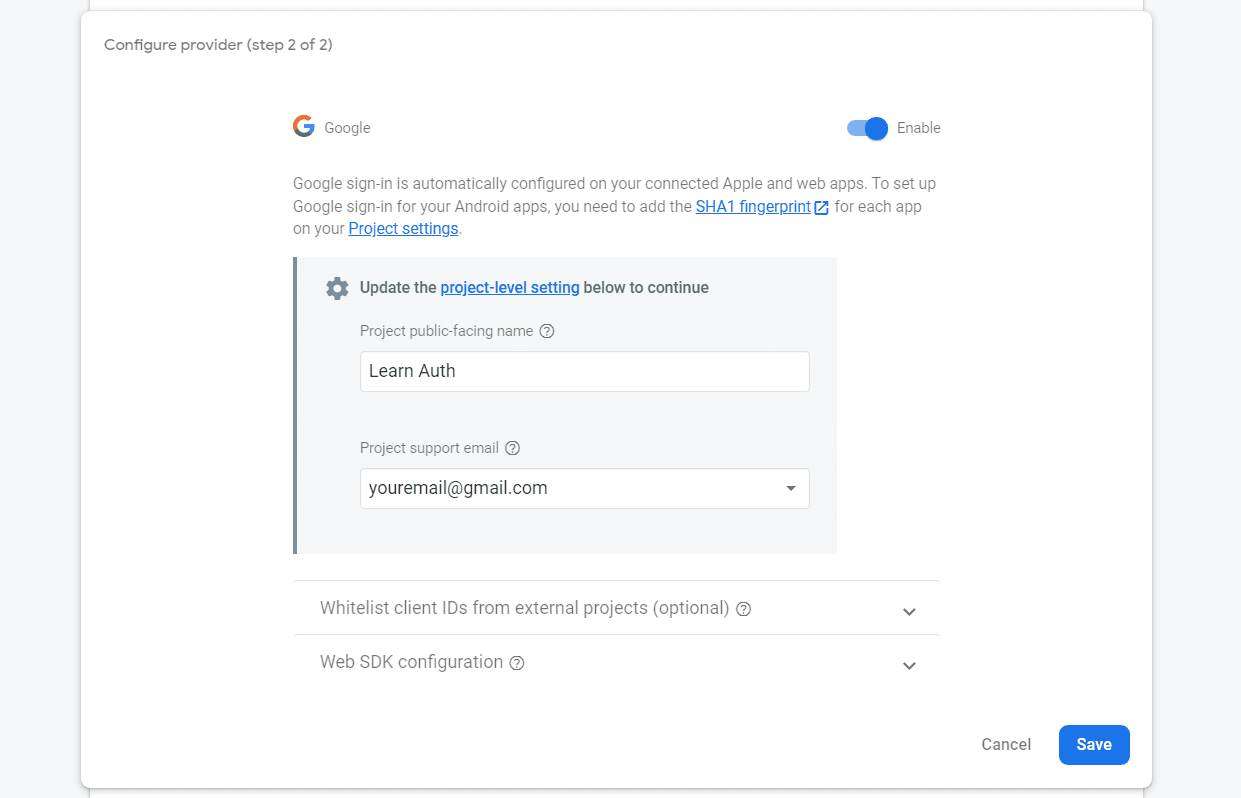
Now to add Google Sign in method tap on Add Provider options. Choose Google then enable the option and then write the name of your website then also select the support email and finally save it.
Next Step is to activate the firestore database that will store user info like name and email.
Go to Build option and select Firestore.

Select start in test mode.
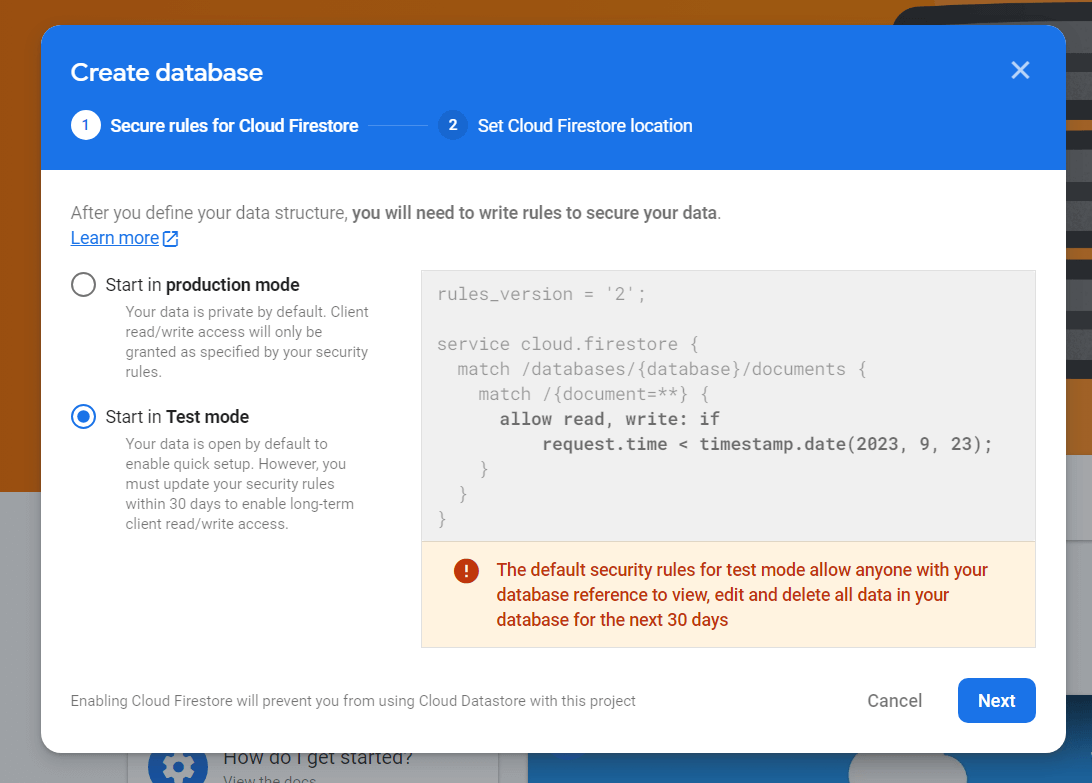
Please note that the db will not work after 30 days after starting this test mode. I will write another post to tell about the firebase rule.
After this select the location. I am keeping the default nam5 (United States) region. Then click on enable. This might take some couple of seconds to minutes so wait till it is provisioned.
Now we are complete with the firebase setup. We will come back to this in the later part of the blog.
Let’s start with the developement side. Open your favorite code editor and let’s get started. I am using VSCode.
Step 2: Setting up React
I have preferred to setup React using Vite. It’s because it’s easy to begin with and then you can use the knowledge to use it other framework like Next.js or Remix.
I have setup up a starter for this project. I have setup tailwind css and included dependencies need and also added basic markup for pages so that we can directly get started.
Download the zip and unzip in your desired location. Here I am unzipping and moving the files in learn-auth folder
Step 2.1 Install Dependencies
Open the console and run
npm install
This will install all the packages.
Now run
npm run dev
and you will see the welcome screen.
Step 2.2: Overview of the files
src/component: UI components of file including a GoogleLogin component which is used in both signup and login pages.
src/pages: Contains all the pages
src/libs: Contains the library specific function. It has only one file which is firebase.ts file which exports 2 function db and auth which we whill reference again and again.
Step 2.3: Firebase Configuration
I have already added firebase as a dependency and also libs/firebase.ts contains the configuration
Step 2.3.1: Creating env
Create .env file and copy the contents of file .env.example into it.
Step 2.3.2: Filling the values
Now fill the values that you have got in step 1.
If you don’t have those values follow these steps: Go to project page
On top left corner click on gear or setting icon beside the project overview
Click on Project settings

On the project settings page scroll down and you will find your apps section and in that it will have same configuration.
Step 3: Signup
Let’s work on signup functionality.
In this there are two ways for signup one is google account and other one is email/password.
We are also collecting name in the form and we will store it in firestore database.
Step 3.1: Email Password Sign up functionality
Step 3.1.1: Add onClick function handleSignup and also define handleSignup function
const Signup = () => {
  const handleSignup = async (e: React.FormEvent<HTMLFormElement>) => {
    e.preventDefault();
  };

return(
...
<form onSubmit={handleSignup} className="w-[100%] mx-auto md:w-auto">
...
)

}
Step 3.1.2: Now lets extract the values from form first then we will move to next steps
We are going to use FormData constructor to get the data.
Try this
const handleSignup = async (e: React.FormEvent<HTMLFormElement>) => {
  e.preventDefault();

    const form = e.target as HTMLFormElement;
    const formValues = new FormData(form);

    console.log("formData", formValues.get("name"));
};
You will see the name entered in the form. Please remember that the parameter inside the formValues.get() must match the input name field.
Let’s develop the functionality further.
To sign up their is function called createUserWithEmailAndPassword() and after successfull signup it will return the userCredentials.
Let’s console.log what does it looks like:
(updated code for handleSignup)
import { createUserWithEmailAndPassword } from "firebase/auth";
import { auth } from "../libs/firebase";

  const handleSignup = async (e: React.FormEvent<HTMLFormElement>) => {
    e.preventDefault();

    const form = e.target as HTMLFormElement;
    const formValues = new FormData(form);

    console.log("formData", formValues.get("name"));

    const userCredential = await createUserWithEmailAndPassword(
      auth,
      formValues.get("email") as string,
      formValues.get("password") as string
    );

    console.log("after signup", userCredential);
  };
console.log output
after signup
Object { user: {…}, providerId: null, _tokenResponse: {…}, operationType: "signIn" }
_tokenResponse: Object { kind: "identitytoolkit#SignupNewUserResponse", idToken: "eyJhbGciOiJSUzI1NiIsImtpZCI6ImNmM2I1YWRhM2NhMzkxNTQ4ZDM1OTJiMzU5MjkyM2UzNjAxMmI5MTQiLCJ0eXAiOiJKV1QifQ...", email: "[email protected]", … }
operationType: "signIn"
providerId: null
user: Object { providerId: "firebase", uid: "Bda2dT4zdEfPIUyP7XDoeQuJuqk2", accessToken: "eyJhbGciOiJSUzI1NiIsImtpZCI6ImNmM2I1YWRhM2NhMzkxNTQ4ZDM1OTJiMzU5MjkyM2UzNjAxMmI5MTQiLCJ0eXAiOiJKV1QifQ...", … }
The firebase returns a lot of value. We will store the user name by thier uid using setDoc() method in the users collection.
import { doc, serverTimestamp, setDoc } from 'firebase/firestore';
import { auth, db } from "../libs/firebase";

await setDoc(doc(db, 'users', userCredential.user.uid), {
  name: data.get('name') as string,
  email: data.get('email') as string,
  timeStamp: serverTimestamp()
});
Also I am adding loading states and error handling and after signup I will redirect user to the verify page to verify their email address.
Updated Signup page code
import { useState } from "react";
import { Link, redirect } from "react-router-dom";
import GoogleLogin from "../components/GoogleLogin";
import { createUserWithEmailAndPassword } from "firebase/auth";
import { doc, serverTimestamp, setDoc } from "firebase/firestore";
import { auth, db } from "../libs/firebase";
import { FirebaseError } from "firebase/app";

const Signup = () => {
  const FIREBASE_ERRORS = {
    "auth/email-already-in-use": "A user with that email already exists",
    "auth/weak-password":
      "Please check your password. It should be 6+ characters",
  };
  const [isLoading, setIsLoading] = useState(false);
  const [showPass, setShowPass] = useState(false);

  const [errHandler, setErrHandler] = useState({
    isError: false,
    errorMsg: "",
  });
  const handleSignup = async (e: React.FormEvent<HTMLFormElement>) => {
    e.preventDefault();

    const form = e.target as HTMLFormElement;
    const formValues = new FormData(form);

    try {
      setIsLoading(true);
      setErrHandler({ isError: false, errorMsg: "" });
      const userCredential = await createUserWithEmailAndPassword(
        auth,
        formValues.get("email") as string,
        formValues.get("password") as string
      );

      await setDoc(doc(db, "users", userCredential.user.uid), {
        name: formValues.get("name") as string,
        email: formValues.get("email") as string,
        timeStamp: serverTimestamp(),
      });


      redirect("/verify");
    } catch (error: unknown) {
      const err = error as FirebaseError;

      setErrHandler({
        isError: true,
        errorMsg: FIREBASE_ERRORS[err.code as keyof typeof FIREBASE_ERRORS],
      });
    } finally {
      setIsLoading(false);
    }
  };

  return (
    <div>
      <main className="p-4 md:p-9">
        <h2 className="text-4xl font-medium mt-10 text-center">Sign up</h2>
        <div className="auth-options w-full flex flex-col items-center justify-center">
          <GoogleLogin
            isLoading={isLoading}
            setIsLoading={setIsLoading}
            message="Sign up with Google"
          />
          <div className="mt-5 mb-3 w-full md:w-[380px] flex items-center justify-center">
            <div className="before-or w-[100%] h-[2px] bg-gray-300 mr-2"></div>
            <p className="text-gray-500 or">OR</p>
            <div className="after-or w-[100%] h-[2px] bg-gray-300 ml-2"></div>
          </div>
          <form onSubmit={handleSignup} className="w-[100%] mx-auto md:w-auto">
            <label htmlFor="name" className="mt-5 block text-gray-600">
              Name
            </label>
            <input
              type="text"
              name="name"
              id="name"
              required
              className="border-slate-400 px-3 w-full md:w-[400px] py-2 rounded-md border-2 "
            />
            <label htmlFor="email" className="mt-5 block text-gray-600">
              Email
            </label>
            <input
              type="email"
              name="email"
              id="email"
              required
              className="border-slate-400 px-3 w-full md:w-[400px] py-2 rounded-md border-2 "
            />
            <label htmlFor="password" className="mt-5 block text-gray-600">
              Password
            </label>
            <div className="relative">
              <input
                type={showPass ? "text" : "password"}
                name="password"
                id="password"
                required
                className="border-slate-400 px-3 w-full md:w-[400px] py-2 rounded-md border-2 "
              />
              <button
                type="button"
                aria-label={
                  showPass ? "Password Visible" : "Password Invisible"
                }
                onClick={() => {
                  setShowPass((prev) => !prev);
                }}
              >
                {showPass ? (
                  <svg
                    xmlns="http://www.w3.org/2000/svg"
                    fill="none"
                    viewBox="0 0 24 24"
                    strokeWidth="1.5"
                    stroke="currentColor"
                    className="w-6 select-none text-gray-700 cursor-pointer h-6 absolute top-2 right-2"
                  >
                    <path
                      strokeLinecap="round"
                      strokeLinejoin="round"
                      d="M2.036 12.322a1.012 1.012 0 010-.639C3.423 7.51 7.36 4.5 12 4.5c4.638 0 8.573 3.007 9.963 7.178.07.207.07.431 0 .639C20.577 16.49 16.64 19.5 12 19.5c-4.638 0-8.573-3.007-9.963-7.178z"
                    ></path>
                    <path
                      strokeLinecap="round"
                      strokeLinejoin="round"
                      d="M15 12a3 3 0 11-6 0 3 3 0 016 0z"
                    ></path>
                  </svg>
                ) : (
                  <svg
                    xmlns="http://www.w3.org/2000/svg"
                    fill="none"
                    viewBox="0 0 24 24"
                    strokeWidth="1.5"
                    stroke="currentColor"
                    className="w-6 select-none text-gray-700 cursor-pointer h-6 absolute top-2 right-2"
                  >
                    <path
                      strokeLinecap="round"
                      strokeLinejoin="round"
                      d="M3.98 8.223A10.477 10.477 0 001.934 12C3.226 16.338 7.244 19.5 12 19.5c.993 0 1.953-.138 2.863-.395M6.228 6.228A10.45 10.45 0 0112 4.5c4.756 0 8.773 3.162 10.065 7.498a10.523 10.523 0 01-4.293 5.774M6.228 6.228L3 3m3.228 3.228l3.65 3.65m7.894 7.894L21 21m-3.228-3.228l-3.65-3.65m0 0a3 3 0 10-4.243-4.243m4.242 4.242L9.88 9.88"
                    ></path>
                  </svg>
                )}
              </button>
            </div>

            {errHandler.isError ? (
              <div className="w-[100%] mx-auto md:w-auto bg-red-600 mt-3 rounded-md px-3 py-2 text-white">
                {errHandler.errorMsg}
              </div>
            ) : null}
            <div className="flex justify-end">
              <button
                type="submit"
                disabled={isLoading}
                className="bg-slate-800 mt-5 w-full px-10 py-2  border-2 border-solid border-mainbg rounded-md text-white hover:scale-95 duration-100 ease-in disabled:bg-gray-700 "
              >
                {isLoading ? "Signing up..." : "Sign up"}
              </button>
            </div>
          </form>
          <p className="mt-5 text-left">
            Already have an account?{" "}
            <Link to="/login" className="font-medium">
              Log in
            </Link>
          </p>
        </div>
      </main>
    </div>
  );
};

export default Signup;
Step 3.1.3: Verify Email
After the successfull signup, the next step is to perform email verification. This is to ensure user is using authentic email.
Firebase provides a very easy way to do this. There’s a sendEmailVerification function which takes auth as a parameter.
Firstly create a new page name VerifyEmail.tsx in pages folder and register the route in App.tsx
...
<Suspense fallback={<Loading />}>
  <Routes>
    <Route path="/" element={<Layout />}>
      <Route index element={<Home />} />
      <Route path="login" element={<Login />} />
      <Route path="signup" element={<Signup />} />
      <Route path="verify" element={<VerifyEmail />} />
      <Route path="dashboard" element={<Dashboard />} />
      <Route path="Profile" element={<Profile />} />
    </Route>
  </Routes>
</Suspense>
...
Now add the sendEmailVerification method to the VerifyEmail page. Also add the guard against the following case User is not logged. User is logged in and have email already verified
In above case we will redirect user to the login page and dashboard page respectively.
import { useEffect, useState } from "react";
import { auth } from "../libs/firebase";

import { sendEmailVerification } from "firebase/auth";
import { Link, useNavigate } from "react-router-dom";

const VerifyEmail = () => {
  const [isCheckingStatus, setIsCheckingStatus] = useState(true);
  const [isVerified, setIsVerified] = useState(false);
  const [sentMail, setSentMail] = useState(false);

  const navigate = useNavigate();

  const sendVerificationEmail = async () => {
    try {
      auth.authStateReady().then(() => {
        if (!auth.currentUser || auth.currentUser === null) {
          return navigate("/login");
        }

        if (auth.currentUser?.emailVerified) {
          setIsVerified(true);
          return navigate("/dashboard");
        } else {
          sendEmailVerification(auth.currentUser!).then(() => {
            setSentMail(true);
          });
        }
      });
    } catch (error) {
      throw new Error("Error while sending email");
    } finally {
      setIsCheckingStatus(false);
    }
  };

  useEffect(() => {
    sendVerificationEmail();
  }, []);

  return (
    <div className="md:w-1/2 mx-auto mt-32 py-10 rounded-md px-3 flex items-center justify-center bg-slate-100 shadow-md">
      {isCheckingStatus ? (
        <div>Checking Auth Status...</div>
      ) : (
        <>
          {isVerified ? (
            <>
              <p className="text-center">
                You have already verified your email. Redirecting you to
                dashboard
              </p>
            </>
          ) : (
            <>
              {sentMail ? (
                <div className="flex flex-col gap-3 items-center justify-center">
                  <p>Sent Verification mail successfully.</p>
                  <p>
                    Please check your spam folder if you can't find it in inbox.
                  </p>

                  <Link
                    to="/login"
                    className="rounded-md bg-blue-600 text-white px-5 py-2"
                  >
                    Log in
                  </Link>
                </div>
              ) : (
                <>
                  <div className="text-center flex flex-col gap-3 items-center justify-center">
                    Sending Email in progress...
                  </div>
                </>
              )}
            </>
          )}
        </>
      )}
    </div>
  );
};

export default VerifyEmail;
Please note one thing here. I am using auth.authStateReady() as it take some time to setup firebase and get auth option for firebase after the component mounts. So this ensures that we have now got the auth information.
Else if you don’t use this the auth will be undefined.
This will send email to the user. And the user will be able to verify the email.
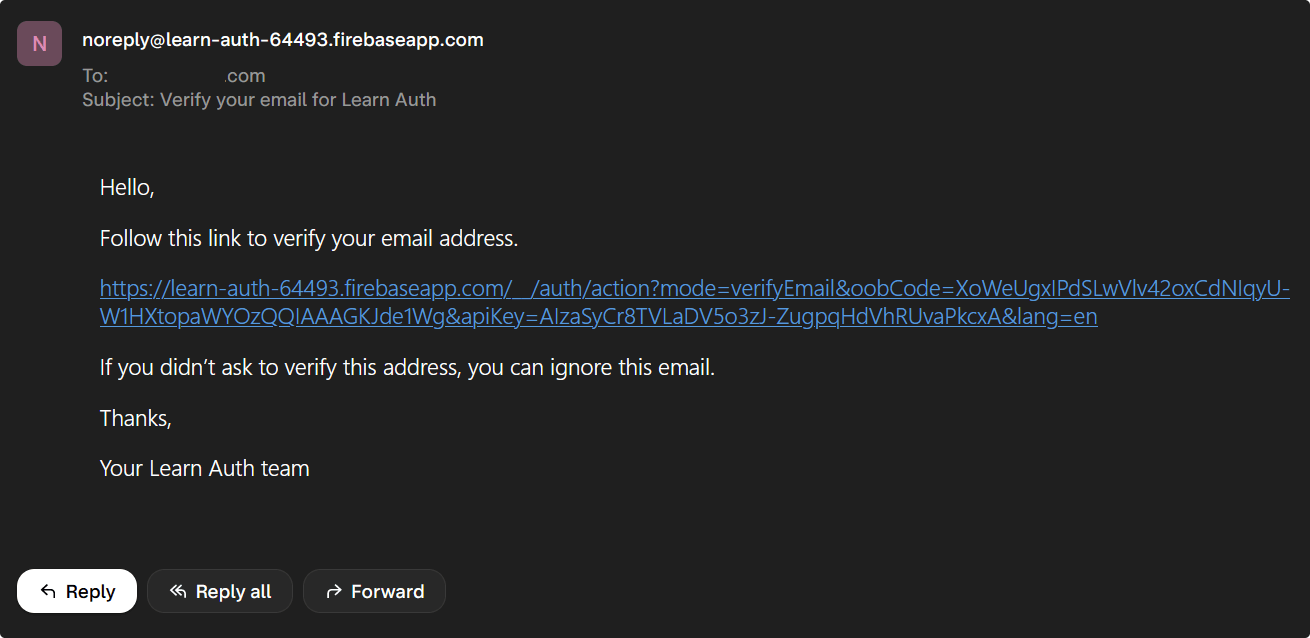
Now user will be able to login. Note that we will prevent the user in login action who doesn’t have their email verified.
Now let’s see how to perform Google Authentication.
Step 3.2: Signup/Login with Google
Step 3.2.1: Initiliase a provider
Intialiase a new google provider which will facilitate the signup/login process.
const provider = new GoogleAuthProvider();
then we will use the signInWithRedirect() function which takes 2 arguements: auth and provider
await signInWithRedirect(auth, provider);
now if the user clicks on the button then the user is redirected to the google auth page where they can choose thier account and after successfull login they are redirected to the same login page of our app.
Now we will fetch the auth information using the getRedirectResult() method. And if it’s success then we will firstly store the user name and email in the firestore db just as the above signup process and then redirect the user.
As this component is shared then the number of time user login the document will be updated so to prevent that I am adding a checking before adding it to the firestore.
Updated GoogleLogin.tsx page
import {
  GoogleAuthProvider,
  getRedirectResult,
  signInWithRedirect,
} from "firebase/auth";
import { useState, useEffect } from "react";
import { auth, db } from "../libs/firebase";
import { useNavigate } from "react-router-dom";
import Spinner from "./Spinner";
import { doc, getDoc, serverTimestamp, setDoc } from "firebase/firestore";

interface Props {
  message: string;
  isLoading: boolean;
  setIsLoading: React.Dispatch<React.SetStateAction<boolean>>;
}

const GoogleLogin = ({ message, isLoading, setIsLoading }: Props) => {
  const [errHandler, setErrHandler] = useState({
    isError: false,
    errorMsg: "",
  });

  const [signInLoading, setSignInLoading] = useState(false);
  const provider = new GoogleAuthProvider();

  const navigate = useNavigate();

  async function handleLogin() {
    try {
      setIsLoading(true);
      setSignInLoading(true);
      setErrHandler({ isError: false, errorMsg: "" });
      await signInWithRedirect(auth, provider);
    } catch (error) {
      setIsLoading(false);
      setSignInLoading(false);
      setErrHandler({
        isError: true,
        errorMsg: "Error while log in with google.",
      });
    }
  }

  const authResult = async () => {
    try {
      setSignInLoading(true);
      const user = await getRedirectResult(auth);
      return user;
    } catch (error) {
      setIsLoading(false);
      setSignInLoading(false);
      setErrHandler({
        isError: true,
        errorMsg: "Error while log in with google.",
      });

      return null;
    }
  };

  useEffect(() => {
    authResult()
      .then(async (res) => {
        setSignInLoading(false);
        if (!res) {
          return;
        }

        const docRef = doc(db, "users", res.user.uid);
        const docSnap = await getDoc(docRef);

        if (docSnap.exists()) {
          navigate("/dashboard");
          return;
        }

        await setDoc(docRef, {
          name: res.user.displayName,
          email: res.user.email,
          timeStamp: serverTimestamp(),
        });
        navigate("/dashboard");
      })
      .catch(() => {
        setIsLoading(false);
        setSignInLoading(false);
        setErrHandler({
          isError: true,
          errorMsg: "Error while log in with google.",
        });

        return null;
      });
  }, []);

  return (
    <>
      <button
        onClick={handleLogin}
        type="button"
        className=" hover:scale-95 duration-100 ease-in flex mt-10 w-[100%] md:w-[400px] border-2 border-solid shadow-sm border-slate-400 py-2 px-10 md:px-16 rounded-md items-center justify-center disabled:bg-gray-50 "
        disabled={isLoading}
      >
        {signInLoading ? (
          <>
            <div className="animate-spin mr-2 ">
              <Spinner />
            </div>
            <p>{message}</p>
          </>
        ) : (
          <>
            <svg
              className="mr-2 h-6 w-6"
              aria-hidden="true"
              focusable="false"
              data-prefix="fab"
              data-icon="github"
              role="img"
              xmlns="http://www.w3.org/2000/svg"
              viewBox="0 0 24 24"
            >
              <path
                d="M22.56 12.25c0-.78-.07-1.53-.2-2.25H12v4.26h5.92c-.26 1.37-1.04 2.53-2.21 3.31v2.77h3.57c2.08-1.92 3.28-4.74 3.28-8.09z"
                fill="#4285F4"
              ></path>
              <path
                d="M12 23c2.97 0 5.46-.98 7.28-2.66l-3.57-2.77c-.98.66-2.23 1.06-3.71 1.06-2.86 0-5.29-1.93-6.16-4.53H2.18v2.84C3.99 20.53 7.7 23 12 23z"
                fill="#34A853"
              ></path>
              <path
                d="M5.84 14.09c-.22-.66-.35-1.36-.35-2.09s.13-1.43.35-2.09V7.07H2.18C1.43 8.55 1 10.22 1 12s.43 3.45 1.18 4.93l2.85-2.22.81-.62z"
                fill="#FBBC05"
              ></path>
              <path
                d="M12 5.38c1.62 0 3.06.56 4.21 1.64l3.15-3.15C17.45 2.09 14.97 1 12 1 7.7 1 3.99 3.47 2.18 7.07l3.66 2.84c.87-2.6 3.3-4.53 6.16-4.53z"
                fill="#EA4335"
              ></path>
              <path d="M1 1h22v22H1z" fill="none"></path>
            </svg>
            <p>{message}</p>
          </>
        )}
      </button>

      <div className="w-[100%] md:w-[400px] mx-auto">
        {errHandler.isError ? (
          <div className="  bg-red-600 mt-3 rounded-md px-3 py-2 text-white">
            {errHandler.errorMsg}
          </div>
        ) : null}
      </div>
    </>
  );
};

export default GoogleLogin;
In this component I am receiving message and setIsLoading as props. These are the props passes by the Signup and Login page.
Why these props?
message: It is a string prop. I am using this to customise the title. Like for Signup it will say Sign up with Google. And for login page it will say Login in google. This takes care of our google auth.
setIsLoading: It is a update function of loading state of the login and signup page. It is used to disable the button so that if user click on the signup or login the user cannot press that button further until the process is complete.
isLoading: It is the use state value. It is used to disable the button when signup and login is done.
It has also local state to handle loading state.
const [signInLoading, setSignInLoading] = useState(false);
You would ask, why didn’t you use the isLoading to show spinner state??
Because when I login with email and password it would set loading to true and thus it will show spinner in google button too that’s why I am managing local useState for that.
Please note that we are not persisting user login state in our client app. We will cover this in Section 5.
Step 4: Login
Login is also very easy. You can use signInWithEmailAndPassword() function to accomplish that. Rest everything is same as Signup process.
Please note that I will not allow user whose email is not verified to sign in. I will show the error component.
Also I am doing 1 cheat basically. When user hits on login button I will logout the user as the firebase is storing the credential of the signup of the user whose email is not even verified. But I am not storing that data in my global context (this is reference to the section 5).
So I am performing logout of the user to clear any values that firebase would have stored in browser after the signup.
Here is finished code.
import React, { useState, useContext } from "react";
import GoogleLogin from "../components/GoogleLogin";
import { Link, Navigate, useNavigate } from "react-router-dom";
import { FirebaseError } from "firebase/app";

import { auth } from "../libs/firebase";
import { signInWithEmailAndPassword, signOut } from "firebase/auth";
import { AuthContext } from "../context/AuthContext";

const Login = () => {
  const [isLoading, setIsLoading] = useState(false);
  const [showPass, setShowPass] = useState(false);

  const navigate = useNavigate();

  const [errHandler, setErrHandler] = useState({
    isError: false,
    errorMsg: "",
  });

  const [emailNotVerified, setEmailNotVerified] = useState(false);

  const { currentUser } = useContext(AuthContext);
  if (currentUser) {
    return <Navigate to="/dashboard" />;
  }

  const FIREBASE_ERRORS = {
    "auth/email-already-in-use": "A user with that email already exists",
    "auth/weak-password":
      "Please check your password. It should be 6+ characters",
    "auth/user-not-found": "Invalid email or password",
    "auth/wrong-password": "Invalid email or password",
  };

  const handleLogin = async (e: React.FormEvent<HTMLFormElement>) => {
    e.preventDefault();

    const form = e.target as HTMLFormElement;
    const formValues = new FormData(form);

    try {
      // this is a trick to resolve the issue to resolve the authStateChanged when user verifies their email and login then it doesnot changes as it is same as signup
      await signOut(auth);
      setIsLoading(true);
      setEmailNotVerified(false);
      setErrHandler({ isError: false, errorMsg: "" });
      const userCredential = await signInWithEmailAndPassword(
        auth,
        formValues.get("email") as string,
        formValues.get("password") as string
      );
      if (userCredential.user) {
        if (!userCredential.user.emailVerified) {
          setEmailNotVerified(true);
          setErrHandler({
            isError: true,
            errorMsg: "Please verify your mail before logging in.",
          });
        } else {
          navigate("/dashboard");
        }
      }
    } catch (error: unknown) {
      const err = error as FirebaseError;

      setErrHandler({
        isError: true,
        errorMsg: FIREBASE_ERRORS[err.code as keyof typeof FIREBASE_ERRORS],
      });
    } finally {
      setIsLoading(false);
    }
  };

  return (
    <div>
      <h2 className="text-4xl font-medium mt-10 text-center">Log in</h2>
      <div className="auth-options w-full flex flex-col items-center justify-center">
        <GoogleLogin
          isLoading={isLoading}
          setIsLoading={setIsLoading}
          message="Sign in with Google"
        />
        <div className="mt-5 mb-3 w-full md:w-[380px] flex items-center justify-center">
          <div className="before-or w-[100%] h-[2px] bg-gray-300 mr-2"></div>
          <p className="text-gray-500 or">OR</p>
          <div className="after-or w-[100%] h-[2px] bg-gray-300 ml-2"></div>
        </div>
        <form onSubmit={handleLogin} className="w-[100%] mx-auto md:w-auto">
          <label htmlFor="email" className="mt-5 block text-gray-600">
            Email
          </label>
          <input
            type="text"
            name="email"
            id="email"
            className="border-slate-400 px-3 w-full md:w-[400px] py-2 rounded-md border-2 "
          />
          <label htmlFor="password" className="mt-5 block text-gray-600">
            Password
          </label>
          <div className="relative">
            <input
              type={showPass ? "text" : "password"}
              name="password"
              id="password"
              required
              className="border-slate-400 px-3 w-full md:w-[400px] py-2 rounded-md border-2 "
            />
            <button
              type="button"
              aria-label={showPass ? "Password Visible" : "Password Invisible"}
              onClick={() => {
                setShowPass((prev) => !prev);
              }}
            >
              {showPass ? (
                <svg
                  xmlns="http://www.w3.org/2000/svg"
                  fill="none"
                  viewBox="0 0 24 24"
                  strokeWidth="1.5"
                  stroke="currentColor"
                  className="w-6 select-none text-gray-700 cursor-pointer h-6 absolute top-2 right-2"
                >
                  <path
                    strokeLinecap="round"
                    strokeLinejoin="round"
                    d="M2.036 12.322a1.012 1.012 0 010-.639C3.423 7.51 7.36 4.5 12 4.5c4.638 0 8.573 3.007 9.963 7.178.07.207.07.431 0 .639C20.577 16.49 16.64 19.5 12 19.5c-4.638 0-8.573-3.007-9.963-7.178z"
                  ></path>
                  <path
                    strokeLinecap="round"
                    strokeLinejoin="round"
                    d="M15 12a3 3 0 11-6 0 3 3 0 016 0z"
                  ></path>
                </svg>
              ) : (
                <svg
                  xmlns="http://www.w3.org/2000/svg"
                  fill="none"
                  viewBox="0 0 24 24"
                  strokeWidth="1.5"
                  stroke="currentColor"
                  className="w-6 select-none text-gray-700 cursor-pointer h-6 absolute top-2 right-2"
                >
                  <path
                    strokeLinecap="round"
                    strokeLinejoin="round"
                    d="M3.98 8.223A10.477 10.477 0 001.934 12C3.226 16.338 7.244 19.5 12 19.5c.993 0 1.953-.138 2.863-.395M6.228 6.228A10.45 10.45 0 0112 4.5c4.756 0 8.773 3.162 10.065 7.498a10.523 10.523 0 01-4.293 5.774M6.228 6.228L3 3m3.228 3.228l3.65 3.65m7.894 7.894L21 21m-3.228-3.228l-3.65-3.65m0 0a3 3 0 10-4.243-4.243m4.242 4.242L9.88 9.88"
                  ></path>
                </svg>
              )}
            </button>

            <div className="mt-2 flex justify-end">
              <Link to="/forgot-password">Forgot Password?</Link>
            </div>
          </div>
          {errHandler.isError ? (
            <div className="w-[100%] mx-auto md:w-auto bg-red-600 mt-3 rounded-md px-3 py-2 text-white">
              {errHandler.errorMsg}

              {emailNotVerified ? (
                <div className="  w-full flex items-center  mt-5 mb-2 justify-center">
                  <Link className="border-2 px-3 py-1 rounded-md" to="/verify">
                    Verify Email
                  </Link>
                </div>
              ) : null}
            </div>
          ) : null}
          <div className="flex justify-end">
            <button
              type="submit"
              className="bg-slate-800 mt-5 w-full px-10 py-2  border-2 border-solid border-mainbg rounded-md text-white hover:scale-95 duration-100 ease-in "
            >
              Log in
            </button>
          </div>
        </form>
        <p className="mt-5 text-left">
          Don't have an account?
          <Link to="/signup" className="font-medium">
            Sign up
          </Link>
        </p>
      </div>
    </div>
  );
};

export default Login;
Please note that we are not persisting user login state in our client app. We will cover this in Section 5.
Now let’s implement how to send reset password if the user forgets the password. It also easy. Use the sendPasswordResetMail(auth, email)
Create ForgotPassword page in the pages folder and register the route.
...rest same no changes
<Suspense fallback={<Loading />}>
  <Routes>
    <Route path="/" element={<Layout />}>
      <Route index element={<Home />} />
      <Route path="login" element={<Login />} />
      <Route path="signup" element={<Signup />} />
      <Route path="verify" element={<VerifyEmail />} />
      <Route path="forgot-password" element={<ForgotPassword />} />
      <Route path="dashboard" element={<Dashboard />} />
      <Route path="Profile" element={<Profile />} />
    </Route>
  </Routes>
</Suspense>
ForgotPassword.tsx
import { sendPasswordResetEmail } from "firebase/auth";
import React, { useState } from "react";
import { Link } from "react-router-dom";
import { auth } from "../libs/firebase";

const ForgotPassword = () => {
  const [sentMail, setSentMail] = useState(false);

  const [errHandler, setErrHandler] = useState({
    isError: false,
    errorMsg: "",
  });
  const handleForgotPassword = async (e: React.FormEvent<HTMLFormElement>) => {
    e.preventDefault();

    const form = e.target as HTMLFormElement;
    const formValues = new FormData(form);

    try {
      await sendPasswordResetEmail(auth, formValues.get("email") as string);
      setSentMail(true);
    } catch (error) {
      setErrHandler({
        isError: true,
        errorMsg: "Error while sending email. Trying again later.",
      });
    }
  };
  return (
    <div>
      <h2 className="text-4xl font-medium mt-10 text-center">Password Reset</h2>
      <div className="auth-options w-full flex flex-col items-center justify-center">
        <form
          onSubmit={handleForgotPassword}
          className="w-[100%] mx-auto md:w-auto mt-5"
        >
          <label htmlFor="email" className="mt-5 block text-gray-600">
            Email
          </label>
          <input
            type="text"
            name="email"
            id="email"
            className="border-slate-400 px-3 w-full md:w-[400px] py-2 rounded-md border-2 "
          />

          {sentMail ? (
            <>
              <div className="  w-full md:w-[400px] flex flex-col gap-3 items-center justify-center bg-green-600 text-white mt-5 rounded-md px-3 py-2">
                <h3 className="font-semibold">Mail sent successfully.</h3>
                <p>
                  Please check your spam folder if you can't find it in inbox.
                </p>

                <Link
                  to="/login"
                  className="border-white border-2 px-3 py-1 rounded-md"
                >
                  Back to Login
                </Link>
              </div>
            </>
          ) : null}

          {errHandler.isError ? (
            <div className="w-[100%] mx-auto md:w-auto bg-red-600 mt-3 rounded-md px-3 py-2 text-white">
              {errHandler.errorMsg}
            </div>
          ) : null}
          <div className="flex justify-end">
            <button
              type="submit"
              className="bg-slate-800 mt-5 w-full px-10 py-2  border-2 border-solid border-mainbg rounded-md text-white hover:scale-95 duration-100 ease-in "
            >
              Send Reset Mail
            </button>
          </div>
        </form>
      </div>
    </div>
  );
};

export default ForgotPassword;
Now we have signup and login in place, we will have to implement persisting auth in client side, protecting dashboard page that means only allowing authenticated users to access those pages.
Section 5: Persisting Auth
Now when the user is authenticated, we want to show different state to the user like we will make changes to the navbar like we will replace the login and signup link the logout option.
So thinking of persisting auth, firebase already persist in the browser, they store the auth options in the browser storage and it send request to google authentication servers to validate the request. We don’t have to worry about that.
We just have to check the auth status that we get from firebase and we will store some in global context.
So for this we will use the context api along with of react with useReducer hook.
Step 5.1 Context Setup
Let’s begin the setup. Create a folder context in src folder.
Create a file named AuthContext.tsx. Let’s setup the context. Here is the basic setup.
import { User } from "firebase/auth";
import React, { createContext, useEffect, useState } from "react";
import { auth } from "../libs/firebase";

type InitialState = {
  currentUser: User | null;
};
export const AuthContext = createContext<InitialState>({ currentUser: null });

export const AuthContextProvider = ({
  children,
}: {
  children: React.ReactNode;
}) => {
  const [currentUser, setCurrentUser] = useState<User | null>(null);

  return (
    <AuthContext.Provider value={{ currentUser }}>
     {children}
    </AuthContext.Provider>
  );
};
Now we will have to wrap the app within the context so that other components can access these values.
So go to App.tsx and wrap the whole app in AuthContextProvider
import { Routes, Route } from "react-router-dom";

import { Suspense, lazy } from "react";

import Layout from "./components/Layout";

import Home from "./pages/Home";
import Loading from "./components/Loading";
import ForgotPassword from "./pages/ForgotPassword";
import { AuthContextProvider } from "./context/AuthContext";
const Login = lazy(() => import("./pages/Login"));
const Signup = lazy(() => import("./pages/Signup"));
const Dashboard = lazy(() => import("./pages/Dashboard"));
const Profile = lazy(() => import("./pages/Profile"));
const VerifyEmail = lazy(() => import("./pages/VerifyEmail"));

const App = () => {
  return (
    <AuthContextProvider>
      <Suspense fallback={<Loading />}>
        <Routes>
          <Route path="/" element={<Layout />}>
            <Route index element={<Home />} />
            <Route path="login" element={<Login />} />
            <Route path="signup" element={<Signup />} />
            <Route path="verify" element={<VerifyEmail />} />
            <Route path="forgot-password" element={<ForgotPassword />} />
            <Route path="dashboard" element={<Dashboard />} />
            <Route path="Profile" element={<Profile />} />
          </Route>
        </Routes>
      </Suspense>
    </AuthContextProvider>
  );
};

export default App;
Now we will have to listen for auth changes like when the user sign up, log in or log out so for that we need auth change observer. Firebase provides a very helpful method onAuthStateChanged to achieve this process.
onAuthStateChanged(auth, (user) => {
      if (user) {
        //user exists
      } else{
        // user is not logged in
      }
});
So we will use this observer with the useEffect hook to run once when the component mounts.
So if the user exist and has verified the email then we will update the value of currentUser.
Updated AuthContext.tsx
import { User, onAuthStateChanged } from "firebase/auth";
import React, { createContext, useEffect, useState } from "react";
import { auth } from "../libs/firebase";

type InitialState = {
  currentUser: User | null,
};
export const AuthContext = createContext < InitialState > { currentUser: null };

export const AuthContextProvider = ({
  children,
}: {
  children: React.ReactNode,
}) => {
  const [currentUser, setCurrentUser] = (useState < User) | (null > null);

  useEffect(() => {
    const unsubscribe = onAuthStateChanged(auth, (user) => {
      if (user?.emailVerified) {
        setCurrentUser(user);
      } else {
        setCurrentUser(null);
      }
    });

    return () => {
      unsubscribe();
    };
  }, []);

  return (
    <AuthContext.Provider value={{ currentUser }}>
      {children}
    </AuthContext.Provider>
  );
};
Now we can access the value anywhere and in any component. How to access value stored in context??
Very easy. Just use the useContext hook and pass the context from which you’re trying to read from. In this case we are trying to access value (currentUser) of AuthContext
const {currentUser} = useContext(AuthContext);
Let’s show Logout option to user when the user is logged in and will hide the login and sign up option.
Go to Navbar.tsx and access the currentUser as demonstrated above.
If currentUser exists(which means it is not null) then conditionally render the logout and dashboard links.
Updated Navbar.tsx
import { useContext } from "react";
import { Link } from "react-router-dom";
import { AuthContext } from "../context/AuthContext";

const Navbar = () => {
  const { currentUser } = useContext(AuthContext);

  return (
    <header className="px-3 md:w-[1140px] my-3 mx-auto flex justify-between">
      <h1 className="text-2xl font-bold">
        <Link to="/">Learn Auth</Link>
      </h1>
      <nav>
        <ul className="flex gap-4">
          <li>
            <Link to="/">Home</Link>
          </li>
          {currentUser ? (
            <>
              <li>
                <a href="/dashboard">Dashboard</a>
              </li>
              <li>
                <button>Logout</button>
              </li>
            </>
          ) : (
            <>
              <Link to="/login">Login</Link>
              <Link to="/signup">Signup</Link>
            </>
          )}
        </ul>
      </nav>
    </header>
  );
};

export default Navbar;
Also update the homepage. If the user is authenticated then they will be redirected to the dashboard else to login page.
import { useContext } from "react";
import { AuthContext } from "../context/AuthContext";
import { Link } from "react-router-dom";

const Home = () => {
  const { currentUser } = useContext(AuthContext);
  return (
    <div className="h-[350px] flex flex-col items-center justify-center">
      <h2 className="text-3xl font-bold">Welcome to App</h2>

      <Link
        to={currentUser ? "/dashboard" : "/login"}
        className="px-5 mt-5 py-2 rounded-md bg-blue-700 text-white"
      >
        Go to Dashboard
      </Link>
    </div>
  );
};

export default Home;
Section 6: Logout
This will be easiest to implement to logout the user in firebase. Firebase provides a very handy function called signOut() which take auth as a param.
We will implement this in the Navbar. We will also redirect the user to the homepage..
Updated code Navbar.tsx
import { useContext } from "react";
import { Link, useNavigate } from "react-router-dom";
import { AuthContext } from "../context/AuthContext";
import { auth } from "../libs/firebase";
import { signOut } from "firebase/auth";
const Navbar = () => {
  const { currentUser } = useContext(AuthContext);
  const navigate = useNavigate();
  const handleLogout = async () => {
    await signOut(auth);
    navigate("/");
  };

  return (
    <header className="px-3 md:w-[1140px] my-3 mx-auto flex justify-between">
      <h1 className="text-2xl font-bold">
        <Link to="/">Learn Auth</Link>
      </h1>
      <nav>
        <ul className="flex gap-4">
          <li>
            <Link to="/">Home</Link>
          </li>
          {currentUser ? (
            <>
              <li>
                <Link to="/dashboard">Dashboard</Link>
              </li>
              <li>
                <button onClick={handleLogout}>Logout</button>
              </li>
            </>
          ) : (
            <>
              <li>
                <Link to="/login">Login</Link>
              </li>
              <li>
                <Link to="/signup">Signup</Link>
              </li>
            </>
          )}
        </ul>
      </nav>
    </header>
  );
};

export default Navbar;
Section 7: Protecting Routes
Now at this moment you will see that although we have added authentication, anyone can visit dashboard page but we would only allow the users who are authenticated to visit that page. We wouldn’t want to prevent unauthenticated users to access the protected routes and redirect them to login page in our react firebase app.
There could be many solution. I have chosen the solution is to make another higher order component that would surround the protected route. Let’s see it in action.
In components create a new file called AuthPages.tsx.
In this we will will check the user auth status. It is async process so I will add the loading state too. Also I am using the authStateReady just as in the previous section. This ensures that auth is intialised properly.
import { useEffect, useState } from "react";
import { Navigate } from "react-router-dom";
import Spinner from "./Spinner";
import { auth } from "../libs/firebase";

const AuthPages = ({ children }: { children: JSX.Element }) => {
  const [isUser, setIsAuth] = useState(false);
  const [loading, setLoading] = useState(true);

  useEffect(() => {
    auth.authStateReady().then(() => {
      if (!auth.currentUser) {
        setIsAuth(false);
      } else {
        setIsAuth(true);
      }
      setLoading(false);
    });
  }, []);

  return (
    <>
      {loading ? (
        <div className="flex items-center justify-center h-[400px] ">
          <Spinner customStyle="animate-spin" w="48" h="48" />
        </div>
      ) : (
        <>{isUser ? <>{children}</> : <Navigate to={"/login"} />}</>
      )}
    </>
  );
};
export default AuthPages;
I have used loading state to show the spinner until the auth is intialiased and the status is determined. Initially it is true.
That means initially both authenticated and unauthenticated user will see the spinner. But once the auth is intialiased and user status is determined then the unauthenticated user is redirected to login page and authenticated user can see the protected content.
This solves our protected route problem.
Let’s redirect user who are authenticated and trying to access login and signup route to dashboard page. We will use Navigate component of react router dom. We will access the currentUser from the context and then we will navigate the user if they are authenticated.
Partial code Login.tsx
...rest same no changes
import { AuthContext } from "../context/AuthContext";
const Login = () => {
  const [isLoading, setIsLoading] = useState(false);
  const [showPass, setShowPass] = useState(false);

  const navigate = useNavigate();

  const [errHandler, setErrHandler] = useState({
    isError: false,
    errorMsg: "",
});

  const { currentUser } = useContext(AuthContext);
  if (currentUser) {
    return <Navigate to="/dashboard" />;
  }

...rest all same
}
Section 8: Conclusion
Finally we have implemented firebase authentication in react application.
Please implement Profile page which show the user name and email and also add a new page EditProfile with the ability to update the user info like name. This will help you to implement what you’ve learnt.
All the code regarding this is available on github.
I hope you were able to follow up. If you are getting any error please open an issue in github.
Also if you’re struck join the EverythingCS discord server. There you can chat with me. Currently it has very low member but you all join.