How to host Node.js Express server on VPS/Cloud Ubuntu Nginx with SSL Certificate
Last updated on
In this post we are going to see step by step how to host a typescript nodejs express server on a cloud or a vps machine running ubunutu. We will use Nginx as a proxy.
I am going to use this repo which uses mongodb (atlas) for database so we will also learn about how to get SSL certificate and setup custom domain.
In this guide I am going to use Digital Ocean. Get free 200$ credits for 2 months to try their services. This will work on any VPS provider running Ubuntu.
So let’s set the expectation first. After following this guide you will be able to deploy a nodejs typebased based application on the Ubuntu machine on any vps provider. You will use the pm2 to manage the node process. You will also configure nginx for reverse proxying and also add a custom domain and configure SSL certificate.
Requirements
- A VPS Server
- Domain (if you want to configure SSL certificate)
Step 1: Provisioning and Setup Machine
Firstly we will provision a machine. In my case I will create a new droplet on digitalocean.
Create a new droplet. Choose the location, then choose the configuration. I am going for ubuntu machine running version 23.10.For pricing I am going for basic 6$ package and then you can choose ssh or password based access. I am currently choosing password method here. Then click create and wait till it is provisioned.
After the provisioning is done you will get ip address. Now login to the VM/droplet.
Open you terminal and write ssh root@your_ip and then input your password
ssh root@ip_address

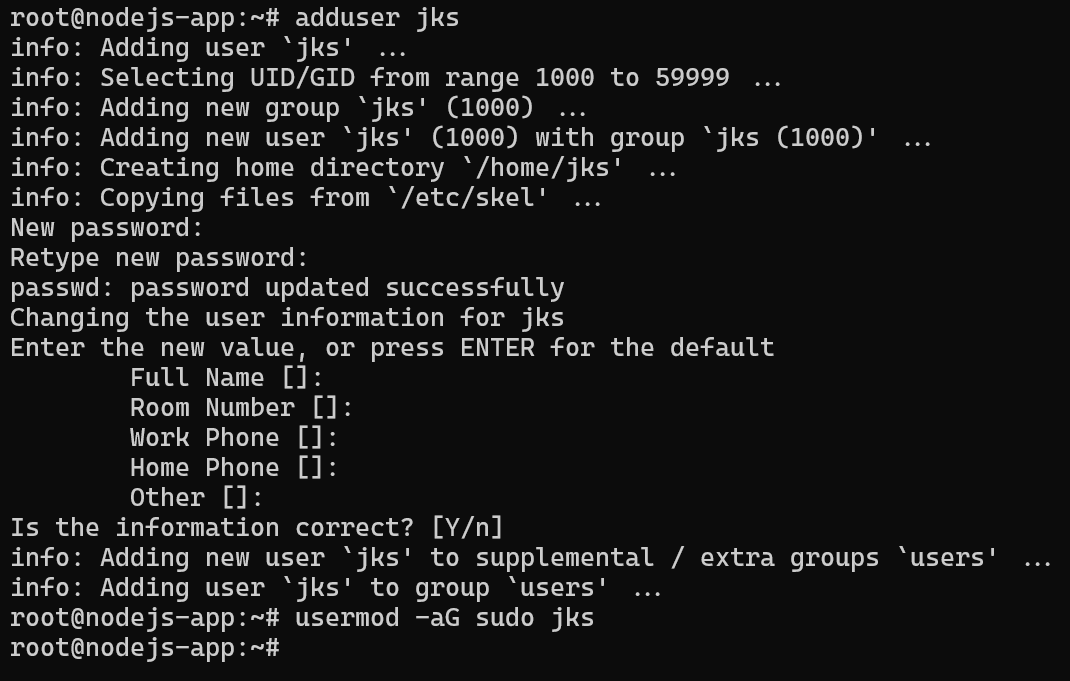
Now create a non root user and create passoword for the user and leave other fields blank.
adduser username
Provide sudo priveledges
usermod -aG sudo username
Now login with the newly created user.
After logging in update the packages using sudo apt update.
Step 2: Installing nodejs
I am going to use nvm to install and manage node version. Alternatively you can use nodesource.
Install nvm (follow the guide from their github installation guide if this is not working)
curl -o- https://raw.githubusercontent.com/nvm-sh/nvm/v0.39.7/install.sh | bash
Copy and paste the export statement provided at last or alternatively relaunch the terminal and let’s install node.js. I am installing node version 18.17. You can install other version if you wish
nvm install 18.17

# or for installing lts

nvm install --lts
Now check if node and npm is installed or not by running the following commands.
node -v

npm -v
Now check if you have git installed. In most cases it would be by default, if it’s not installed then install it via sudo apt-get install git.
Now we will pull the code from github. It is a public repo. If you want to clone the private repo from github follow this guide.
Make sure you’re in home/username directory. Check it by running pwd command. For me its /home/jks
Now clone the repo in todosapp folder (you can name it whatever you want) via git clone repo_url.
git clone https://github.com/ksjitendra18/nodejs-host-vps-guide.git todosapp
You will have the todosapp folder. Navigate into that folder and install the packages first.
npm i
Now the packages are installed we need to provide the environment variable for the mongo db uri. There are two ways I could think of for handling environment variables. Either export it via CLI or create a file over there.
I am creating a env file. Make sure you are in the project folder
touch .env
Now we will input the variables. I am going to use vim.
vim .env
Then press I to get into Insert mode.
Then add the mongodb uri. In my case it is DB_URL=“uri”.
To exist press Espace key and write :wq It will save the file and you will exit the file.
Now let’s try to run the app
npm run build

npm run start
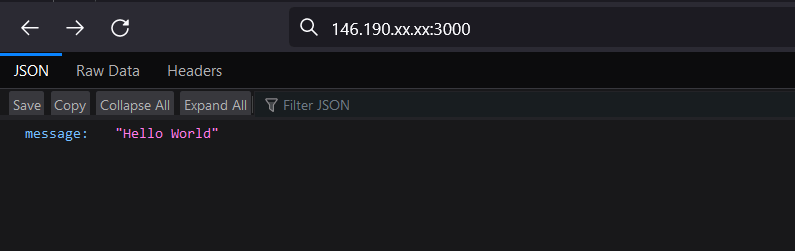
Now visit you application in your browser via going to ip_address:3000
In my case it is 146.90.XX.XX:3000
Managing Firewall
If the webapp is not accessible then there must be some firewall issue. Let’s manage the firewall using ufw.
To check the status of the firewall run
sudo ufw status
In digitalocean it is currently disabled. So let’s setup the firewall and enable the SSH connection and 3000 port
sudo ufw allow OpenSSH

sudo ufw allow 3000

sudo ufw allow 80 # required for ssl

sudo ufw enable
Now the firewall is enabled and only 2 ports are opened. We will modify this at the end.
Step 3: Installing pm2
We will use pm2 for managing the node processes. It is useful for monitoring and also it restarts the app if it crashes. You can read more about it. We will not use extensibly though.
Stop the above process. And then install pm2
npm i pm2 -g
#or
sudo npm install pm2 -g
Let’s start the node.js via pm2
pm2 start ./dist/index.js

#optionally you can provide the name (useful so do it).
pm2 start ./dist/index.js --name=todosapp
Then you will get the following ouput
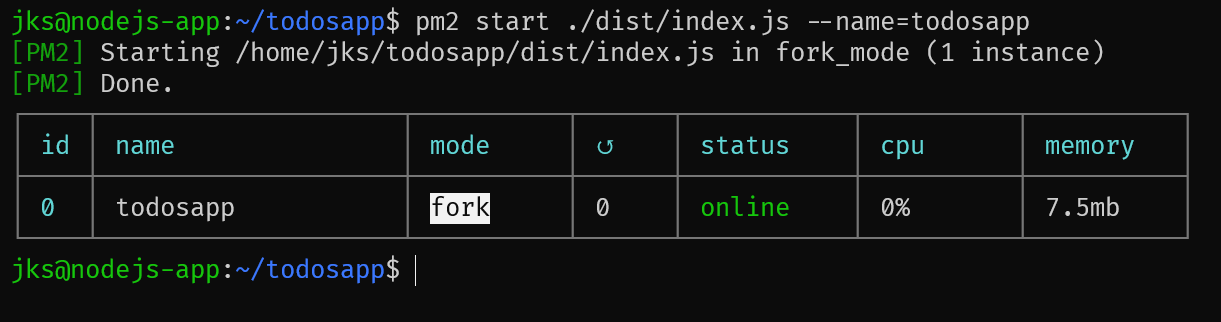
Now try visiting again in your browser.
To setup pm2 so that it restart after the system is rebooted run the following commands.
pm2 startup
After running this command you will get some commands. Copy and paste those commands

After the successfull execution of above commands run the following command
pm2 save
Now whenever your system is rebooted the app will automatically start.
Now let’s setup reverse proxy to easily proxy our request from domain.
Step 4: Installing and configuring nginx
Install nginx first
sudo apt install nginx
Now go to your ip address (without the port). You will see the default nginx welcome screen.
Let’s configure nginx. Go to etc folder then nginx then sites-available and let’s add the new file. The convention is to use the domain name. You can use whatever you like
cd /etc/nginx/sites-available/
Open the file via sudo command because we will perform write operation (replace the domain name with your domain)
sudo nano domain_name
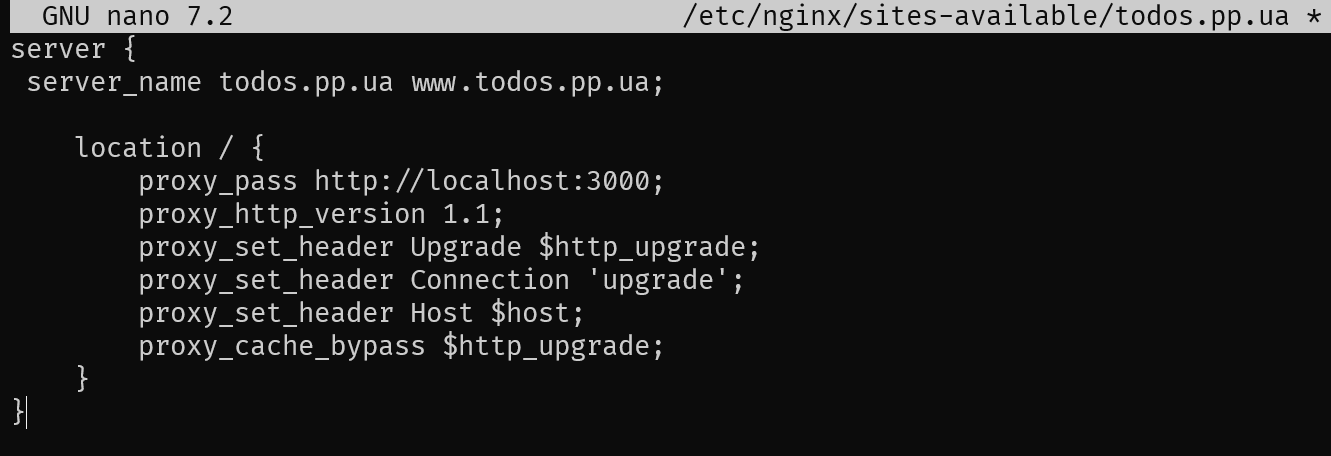
Now add the following code. We are basically routing the request on / to be proxied to app running on port 3000.
server {
 server_name domain.com www.domain.com;

    location / {
        proxy_pass http://localhost:3000;
        proxy_http_version 1.1;
        proxy_set_header Upgrade $http_upgrade;
        proxy_set_header Connection 'upgrade';
        proxy_set_header Host $host;
        proxy_cache_bypass $http_upgrade;
    }
}
For nano editor. After pasting. CTRL + S to save and CTRL + X to exit.
This is what my configuration looks like
Now create a link between sites enabled and this file (change the domain_name to the value you chose above)
sudo ln -s /etc/nginx/sites-available/domain_name /etc/nginx/sites-enabled/
Test if the configuration is valid or not and restart nginx.
sudo nginx -t

sudo systemctl restart nginx
Step 5: Setup Domain
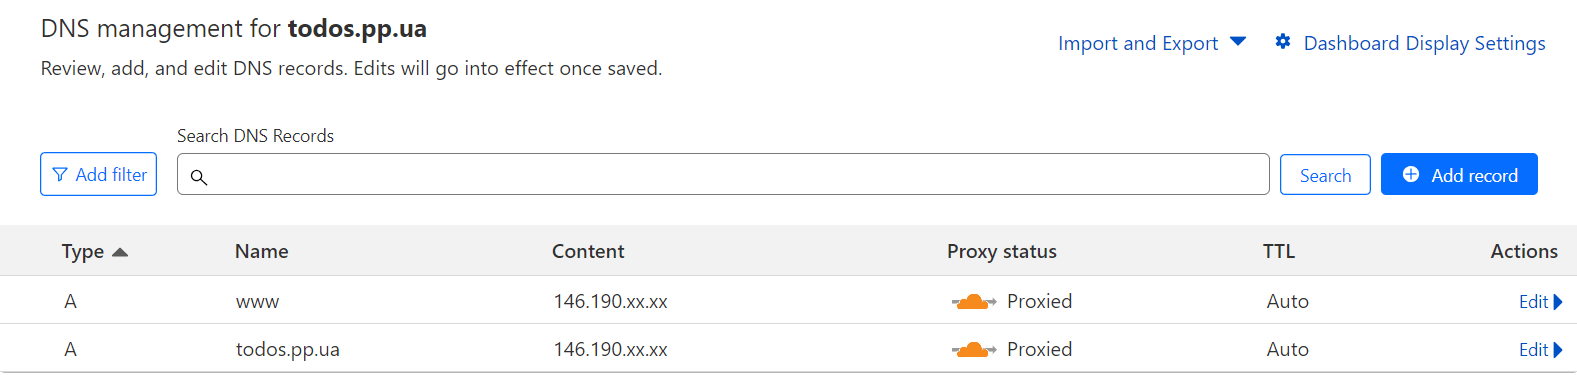
For setting up domain, it’s very easy. Just add 2 A records pointing to the ip address. I am using cloudflare to manage my domain. For security purposes keep the status as Proxied(orange cloud). Here are the records
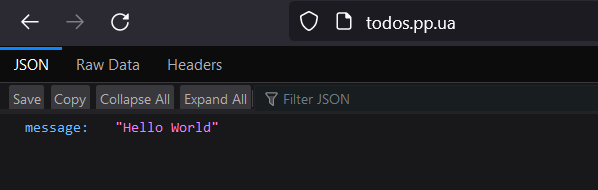
After the dns is propagated (takes some time) you can visit your website via domain name
Step 6: SSL Setup
Now that we have domain setup we can configure ssl certificate. Before this make sure you have port 80 open on your firewall. If not then add it.
sudo ufw allow 80
Perform the following commands
sudo apt install certbot python3-certbot-nginx
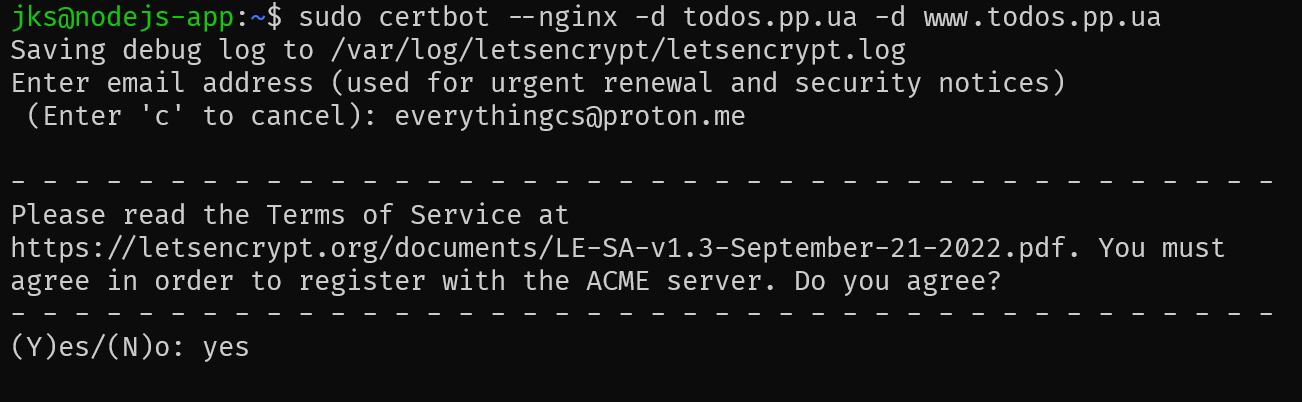
sudo certbot --nginx -d example.com -d www.example.com
Then enter your email and then you either opt in or opt for for newletter. Then you will have your ssl certificate.
The SSL certificate will expire in like 90 days and will be autorenewed.
# try a renew
sudo certbot renew --dry-run
Congratulation you have site deployed with SSL certificate. If you are using Cloudflare for DNS management then make sure to select the full option in the SSL option.
Adjusting firewall
Let’s disable the direct port access and enable only HTTPS access
sudo ufw delete allow 3000

sudo ufw allow 'Nginx HTTPS'
Now let’s quickly test all the CRUD functionality. Here is the video demonstration
Conclusion
So we have deployed a nodejs express typescript server on the VPS server. I have also configured environment variables and ssl certificate.
I have used this repo to demonstrate the process. Free free to use it. You will need mongo db atlas db for perfoming the CRUD operation.
If you are facing any issues then reach me through EverythingCS discord server.