Cloudflare D1 Database and Workers REST API CRUD Operation with Hono
Published On
Cloudflare D1 is a SQLite database offering as a service by Cloudflare which is now in Beta version. Lets explore D1 database using Cloudflare workers and design a restful API performing CRUD (Create, Read, Update, Delete) operations using the Hono Framework.
In this tutorial I am going to build basic Todo application, nothing fancy. I will use basic features provided by cloudflare D1 and in next post I will dive deeper into it like using relations, joins etc and might bring DrizzleORM too.
Watch this demo on what we are going to build
Here is the repository link. Also if you’re facing any issue contact me on discord. Now let’s begin.
Setting up frontend
I have already wrote the frontend for you. It is a simple Vite React setup with SWR for data fetching.
Just download the zip first. Unzip it go to d1-workers-crud-starter-code folder and select the frontend folder and move it to your desired directory.
Make sure you are in the frontend folder then install the packages using
npm i
Then run the following command to run the react program
npm run dev
You will see something like this…
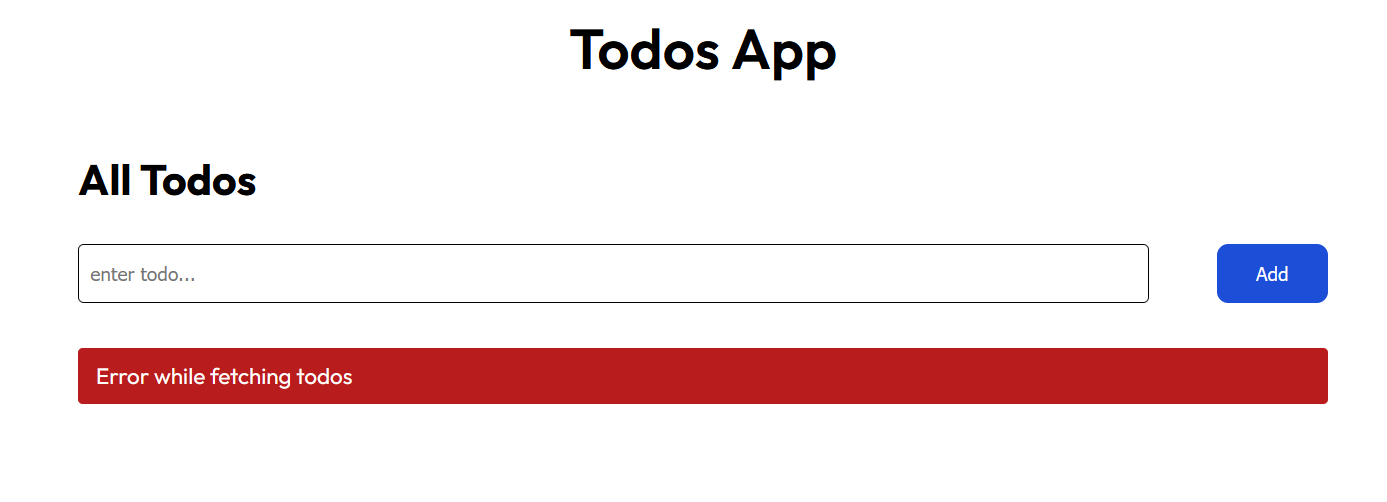
Don’t mind the error for now. That will be fixed
Setting up API
We are going setup hono for API routes for cloudflare workers. Hono is easy and awesome library to create your rest apis. It offers express like api.
I am going to keep frontend and api in single folder. So firstly I will create an empty directory.
mkdir api

cd api
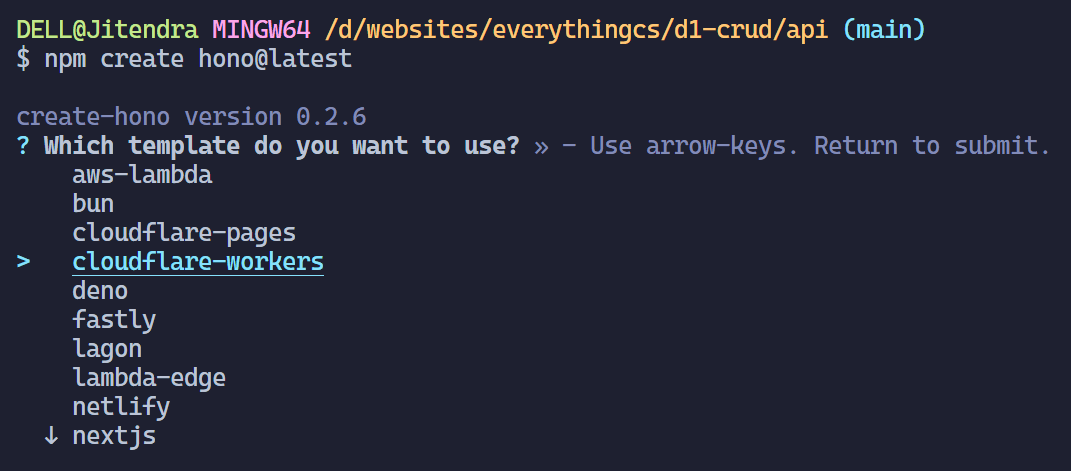
Now in api folder I will create a new hono app using create-hono cli
npm create hono@latest
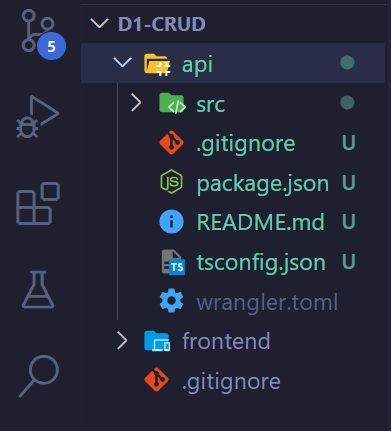
Here is what folder looks like
Now in api folder run npm i to install the packages.
npm i
Then run npm run dev to run developement server and visit http://127.0.0.1:8787/ and you will see basic hello hono text.
Now we will create the database and initialiase the schema.
Database setup
Now we will create the database. Ensure you have wrangler installed globally. If not install it through npm i wrangler -G and login to your cloudflare account by running wrangler login (after installing restart the VSCode if you get wrangler is not recognised command).
Creating Database
Now to create a new D1 database just run wrangler d1 create <database name>. I am naming my database as todos-app.
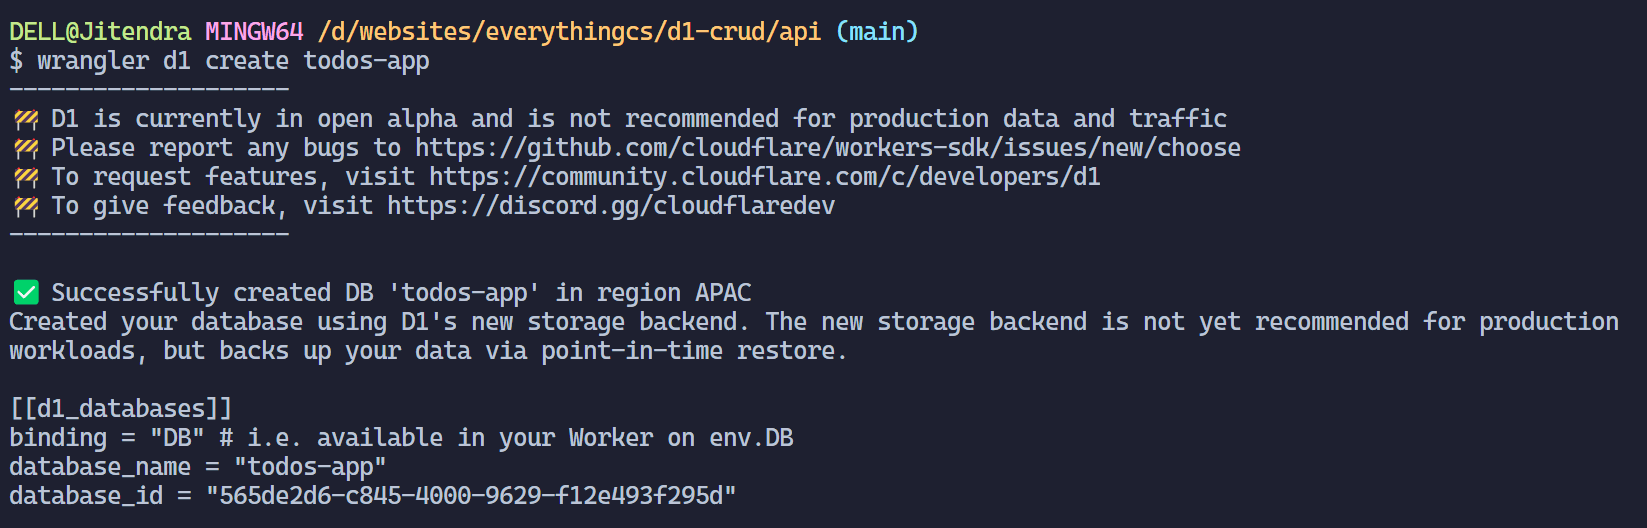
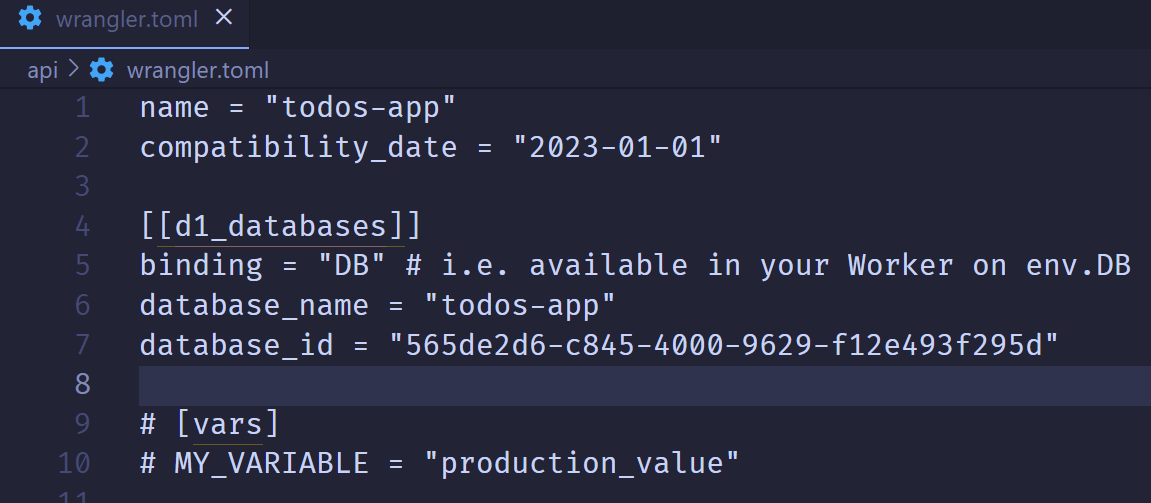
Copy the last 4 lines starting from [[d1_databases]] and paste it in wrangler.toml file. Here is my wrangler.toml file. Please make sure to make these credentials secure. Don’t push it to github or something. I will delete these credentials.
Setting up schema for database
Now we will have to set up the table and also setup schema for that table. It’s quite easy so let’s begin.
Create a db folder inside src folder and inside db folder create a schema.sql file and then paste the following schema for our todo app.
DROP TABLE IF EXISTS todos;
CREATE TABLE IF NOT EXISTS todos (id INTEGER PRIMARY KEY, todo TEXT NOT NULL, is_completed INTEGER NOT NULL DEFAULT 0, created_at DATETIME DEFAULT CURRENT_TIMESTAMP);
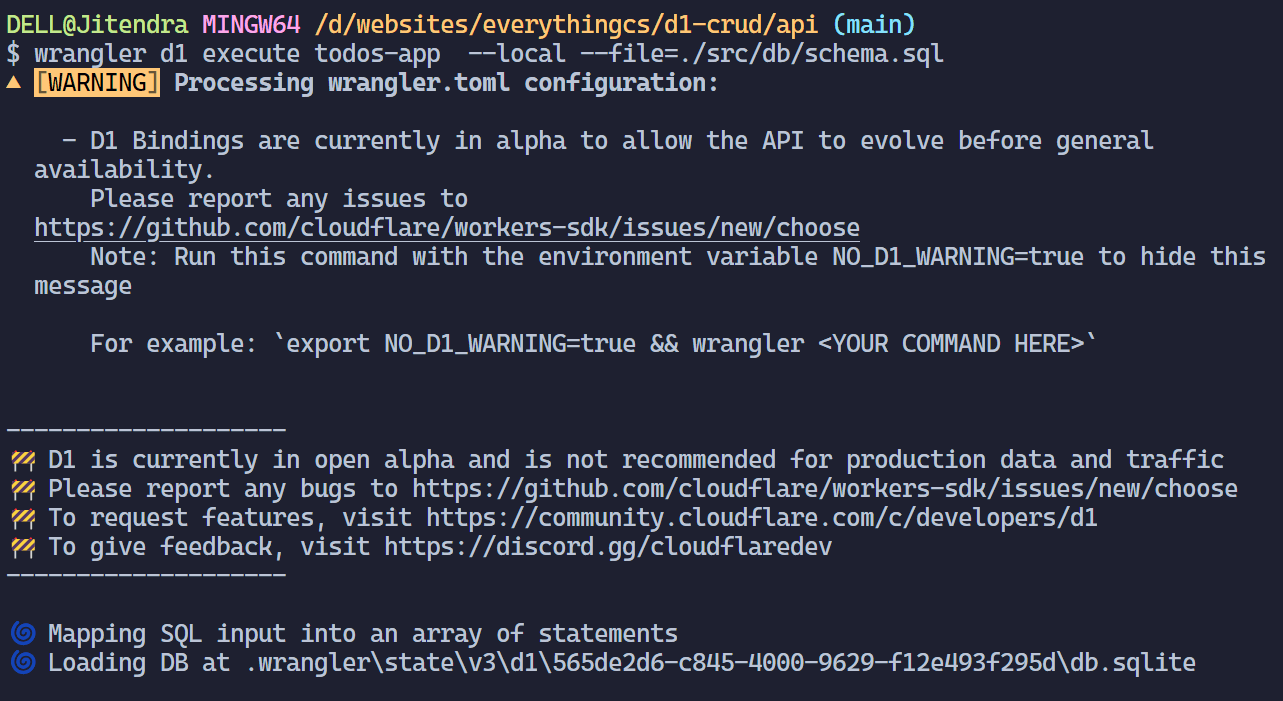
Now we will have to push these changes to the the database. Currently we will be pushing this to the local database and later we will push the schema to the remote database(production database) in the deployment step.
wrangler d1 execute todos-app --local --file=./src/db/schema.sql
Now we have schema in place let’s setup routes and start making queries to the database.
Setting up route
Create a new folder in src named routes. In routes create a new file todos.ts
import { Hono } from "hono";

const todosRoutes = new Hono();

export default todosRoutes;
Now register these routes in index.ts and I have also setup cors.
import { Hono } from "hono";

import todosRoutes from "./routes/todos";
import { cors } from "hono/cors";

type Bindings = {
  DB: D1Database;
  database_id: string;
  database_name: string;
};

const app = new Hono<{ Bindings: Bindings }>();

app.get("/", (c) => c.text("Hello Hono!"));

app.use(
  "/*",
  cors({
    origin: ["http://localhost:5173"],
    allowMethods: ["POST", "GET", "OPTIONS", "DELETE", "PATCH"],
  })
);
app.route("/todos", todosRoutes);

export default app;
Now let’s create the controllers folders in src folder and in controllers folders make a todo folder.
Create Operation
Lets start with the create operation. Make a createTodo.ts file.
We will make a simple SQL query to insert the data. In bind we will pass the value we want to replace the ? (question mark) sign.
await c.env.DB.prepare("INSERT INTO todos (todo) values (?)").bind(todo).run();
import { Context } from "hono";

const createTodos = async (c: Context) => {
  const { todo } = await c.req.json();

  if (!todo) {
    return c.json({
      success: false,
      data: null,
      message: "todo is required",
    });
  }
  try {
    const { success } = await c.env.DB.prepare(
      "INSERT INTO todos (todo) values (?)"
    )
      .bind(todo)
      .run();

    if (!success) {
      return c.json(
        {
          success: false,
          message: "Error while adding new todo",
        },
        { status: 500 }
      );
    }
    return c.json(
      {
        success: true,
        message: "Added Successfully",
      },
      { status: 201 }
    );
  } catch (error) {
    return c.json({
      success: false,
      message: "Error while adding new todo",
    });
  }
};

export default createTodos;
Now register the routes in routes/todos.ts
import { Hono } from "hono";
import createTodos from "../controllers/todos/createTodo";

const todosRoutes = new Hono();

todosRoutes.post("/", createTodos);

export default todosRoutes;
Now let’s try to create a todo. Make sure your api and frontend both are running. If not run it through npm run dev. Now try to create the todo from the form. You will see 201 response in the network tab in the developer tools.
Read Operation
Create a new files in todos under controller folder named getTodos.ts. We will run a basic select query with order by to get the latest todo on top.
import { Context } from "hono";

const getTodos = async (c: Context) => {
  try {
    const { results: todos } = await c.env.DB.prepare(
      "SELECT * FROM todos ORDER BY created_at desc"
    ).all();

    return c.json({
      success: true,
      data: todos,
    });
  } catch (error) {
    return c.json({
      success: false,
      message: "Error while fetching  todos",
    });
  }
};

export default getTodos;
Now register the routes in routes/todos.ts
import { Hono } from "hono";
import createTodos from "../controllers/todos/createTodo";
import getTodos from "../controllers/todos/getTodos";
import deleteTodo from "../controllers/todos/deleteTodos";

const todosRoutes = new Hono();

todosRoutes.post("/", createTodos);
todosRoutes.get("/", getTodos);

export default todosRoutes;
Update Operation
Here we will update the todo as completed. Create a file api/src/controllers/todos/updateTodo.ts in todos folder under controller folder.
import { Context } from "hono";

const updateTodos = async (c: Context) => {
  const { todoStatus } = await c.req.json();
  const todoId = c.req.param("todoId");

  try {
    const { success } = await c.env.DB.prepare(
      "UPDATE todos SET is_completed = ? WHERE id = ?"
    )
      .bind(Number(todoStatus), todoId)
      .run();

    console.log("success", success);

    return c.json({
      success: true,
    });
  } catch (error) {
    return c.json({
      success: false,
      message: "Error while updating  todos",
    });
  }
};

export default updateTodos;
Now register the routes in routes/todos.ts
import { Hono } from "hono";
import createTodos from "../controllers/todos/createTodo";
import getTodos from "../controllers/todos/getTodos";
import deleteTodo from "../controllers/todos/deleteTodos";
import updateTodos from "../controllers/todos/updateTodo";

const todosRoutes = new Hono();

todosRoutes.post("/", createTodos);
todosRoutes.get("/", getTodos);
todosRoutes.patch("/:todoId", updateTodos);
Delete Operation
Now we will delete the todo. Create a file api/src/controllers/todos/deleteTodo.ts in todos folder under controller folder.
import { Context } from "hono";

const deleteTodo = async (c: Context) => {
  const todoId = c.req.param("todoId");

  try {
    const { success } = await c.env.DB.prepare("DELETE FROM todos where id = ?")
      .bind(todoId)
      .run();

    if (!success) {
      return c.json({
        success: true,
        data: {
          deleted: false,
        },
        message: "Unable to delete. Please try later",
      });
    }

    return c.json({
      success: true,
      data: {
        deleted: true,
      },
    });
  } catch (error) {
    console.log("error", error);
    return c.json({
      success: false,
      data: null,
      message: "Server Error",
    });
  }
};

export default deleteTodo;
Now register the routes in routes/todos.ts
import { Hono } from "hono";
import createTodos from "../controllers/todos/createTodo";
import getTodos from "../controllers/todos/getTodos";
import deleteTodo from "../controllers/todos/deleteTodos";
import updateTodos from "../controllers/todos/updateTodo";

const todosRoutes = new Hono();

todosRoutes.post("/", createTodos);
todosRoutes.get("/", getTodos);
todosRoutes.patch("/:todoId", updateTodos);
todosRoutes.delete("/:todoId", deleteTodo);

export default todosRoutes;
Deployment
Now we will have to update the schema of remote database.
wrangler d1 execute todos-app --file=./src/db/schema.sql
Now your remote database will have the schema setup and todos-app table created.
Now host your api on cloudflare workers.
npm run deploy
You will get the live production url. Replace the url of localhost with the live url and you can finally host the frontend.
Conclusion
So we have implemented the REST API performing CRUD functionality using Cloudflare D1 database hosted on Cloudflare Workers. The complete code is on github. If you have any queries we can discuss it on discord.